
Introduction
Organizations live and breathe on documents every moment. Whether it is daily operating procedures, contracts, product design, or reports, the exchange of documents affects your organization’s operational efficiency, reputation, competitiveness and customer experience.
The system is built on a robust and modular architecture. We can assist you integrate ACVITS with your inhouse applications.
The install instructions for ACVITS LAW and ACVITS Corporate are the same. The images used here are from the ACVITS Corporate Edition. Also, the install instructions are the same between version 3.0 and 4.0.
HELP is available!
We are here to help you succeed. For more information https://acvits.info/faq/ or send your questions to info@ooacllc.com.
After the product is installed, you can reach us through the application Help section. We want to hear your feedback and questions as it would help us serve you better.
The following sections walk you through product install using AWS CloudFormation Template.
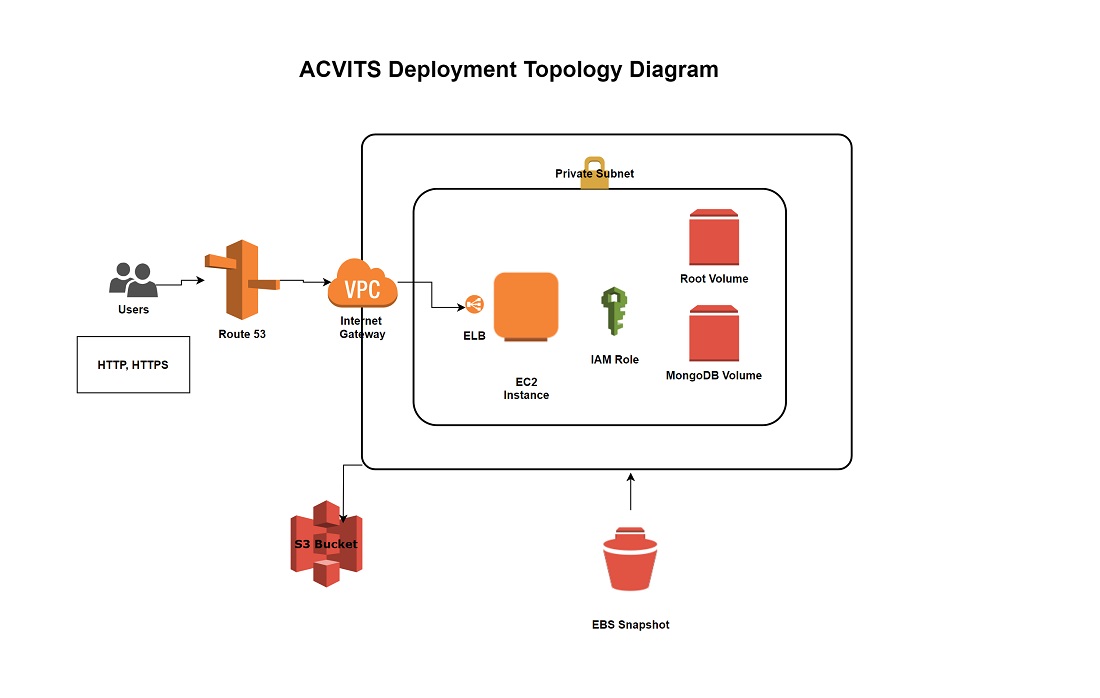
ACVITS Topology Diagram
ACVITS uses AWS services EC2 instance, S3 Bucket, EBS volumes, IAM Role, Security Group, Elastic IP Address and Route 53.
Choose Your AWS Services Region
Choose a region where you plan on installing the product from the AWS Services page.
Create an EC2 Key Pair if you are new to EC2
The CloudFormation creates an EC2 instance and it requires an Key Pair to connect. Follow AWS link (https://docs.aws.amazon.com/AWSEC2/latest/UserGuide/ec2-key-pairs.html#having-ec2-create-your-key-pair) on creating a Key Pair.
Launch ACVITS CloudFormation Template
ACVITS CloudFormation Template is available at AWS Marketplace or you may request for a copy by emailing “info@ooacllc.com”.
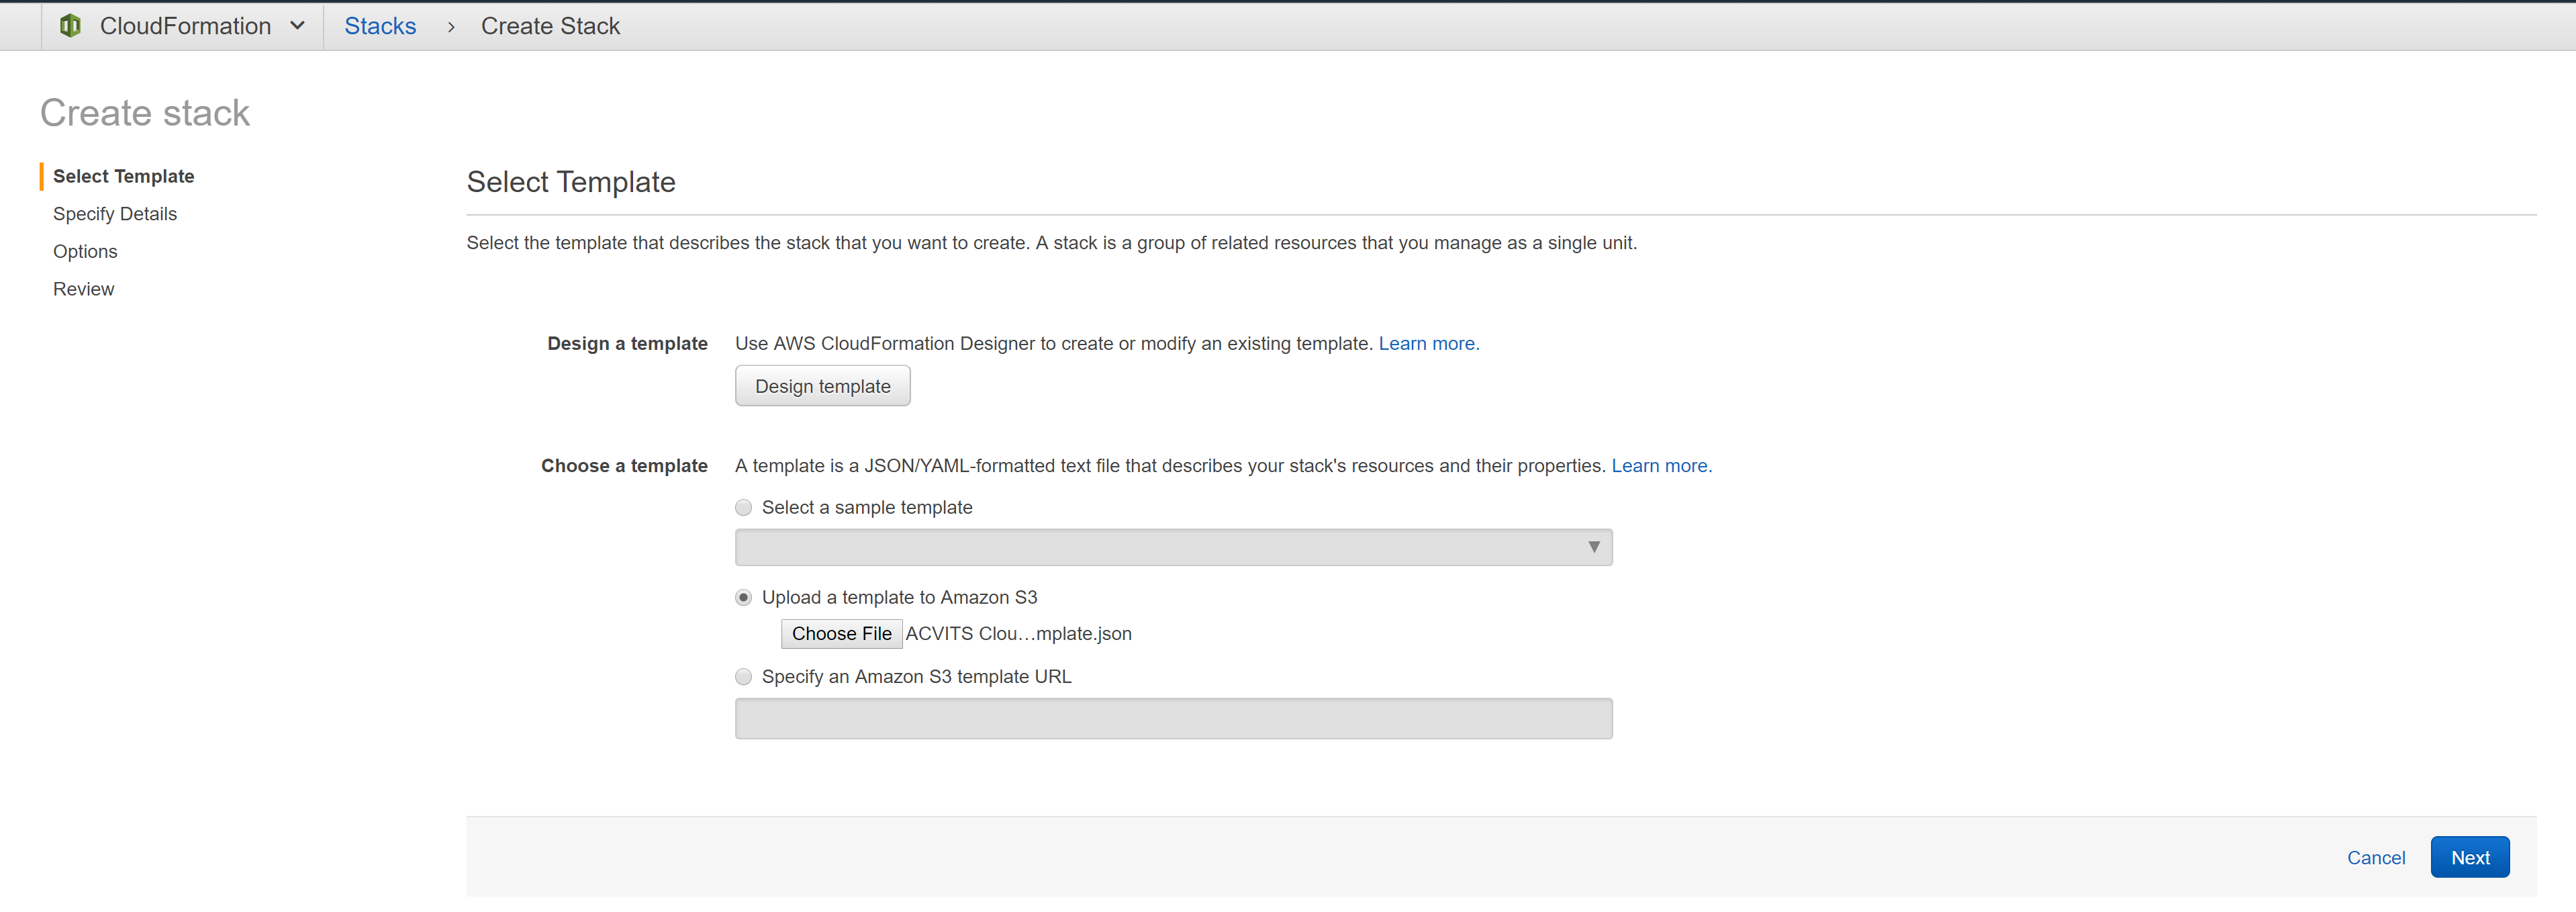
From AWS Services page, go to Management Tools and then click on CloudFormation Template.
- Create a Stack.
Choose the template as seen in the image and click next.
2. Specify Details
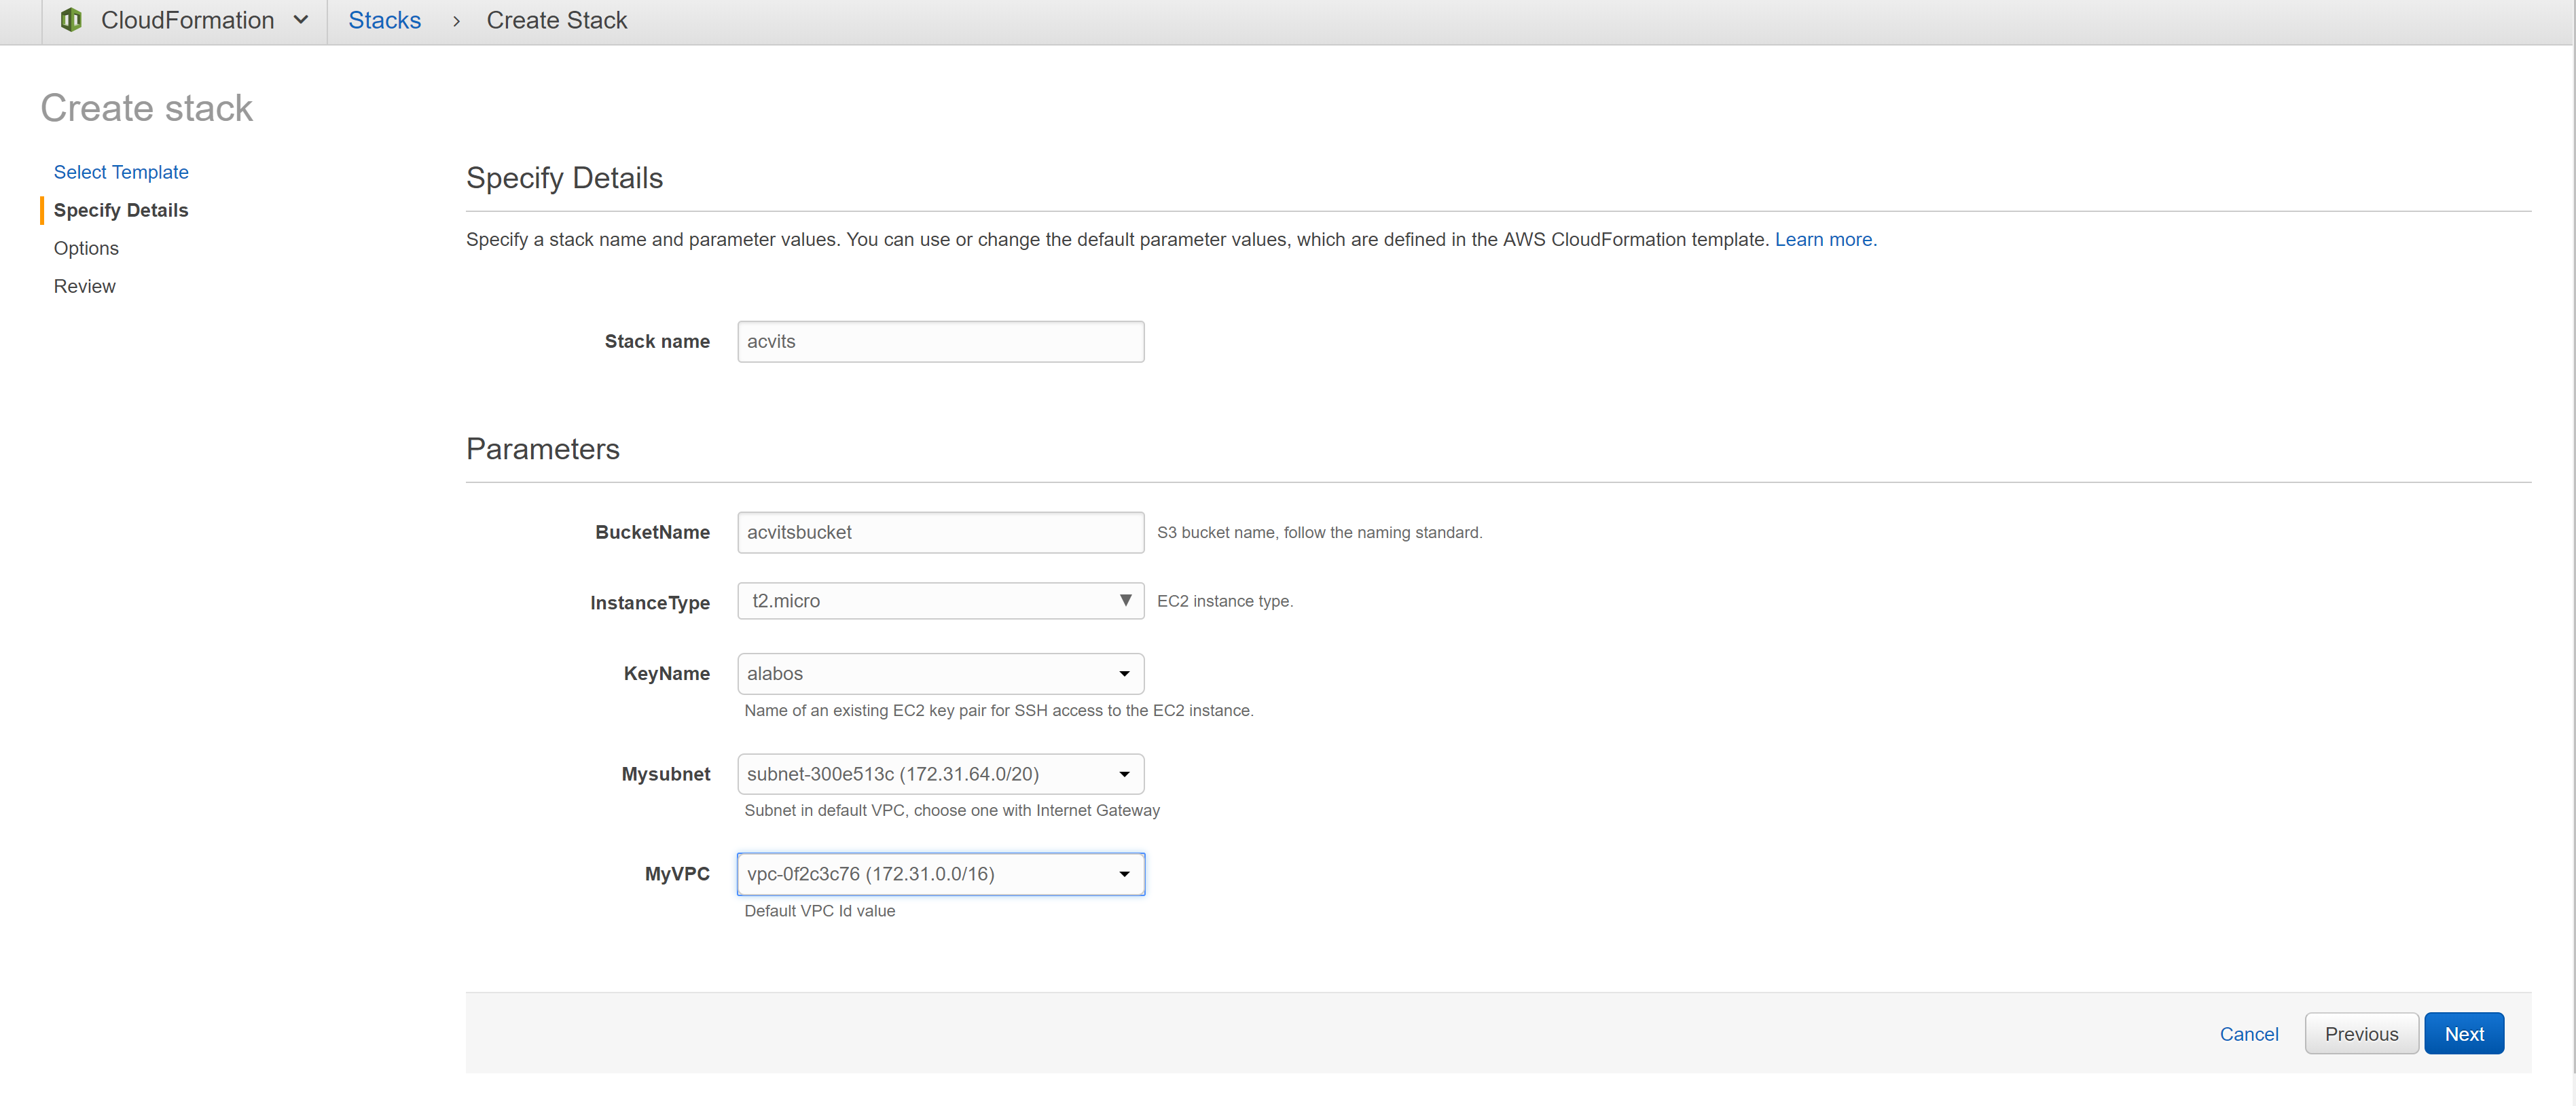
Enter the values in fields to setup your environment.
- Stack name : This is a reference name for your product install in your AWS account. This reference help you remove all services created by launching this template.
- BucketName : This is the S3 bucket where electronic files are stored.
- Instance type : This is the EC2 instance. Choose a type from the drop down list box.
- KeyName : This is the key pair you had created in earlier step.
- MySubNet: Your available Subnets are listed in the dropdown list box. A subnet is part of VPC. Choose a subnet with Route Table having “igh” (Internet Gateway). To find your VPC and subnet, go to AWS Services page, “Networking & Content Delivery” section and click the “VPC” link. From the “VPC Dashboard” page, “Subnets” link is located in the tab. Select a subnet and click on “Route Table” menu to view all entries. An applicable Route table should have a “Destination” record with IP address “0.0.0.0/0” Internet Gateway (igh-XXXXXXXX) value .
- MyVPC : To find your VPC and subnet, go to AWS Services page, “Networking & Content Delivery” section and click the “VPC” link. You can find all your VPC address at this page. Default VPC is displayed.
Click “Next” button after entering all the values.
3. Options
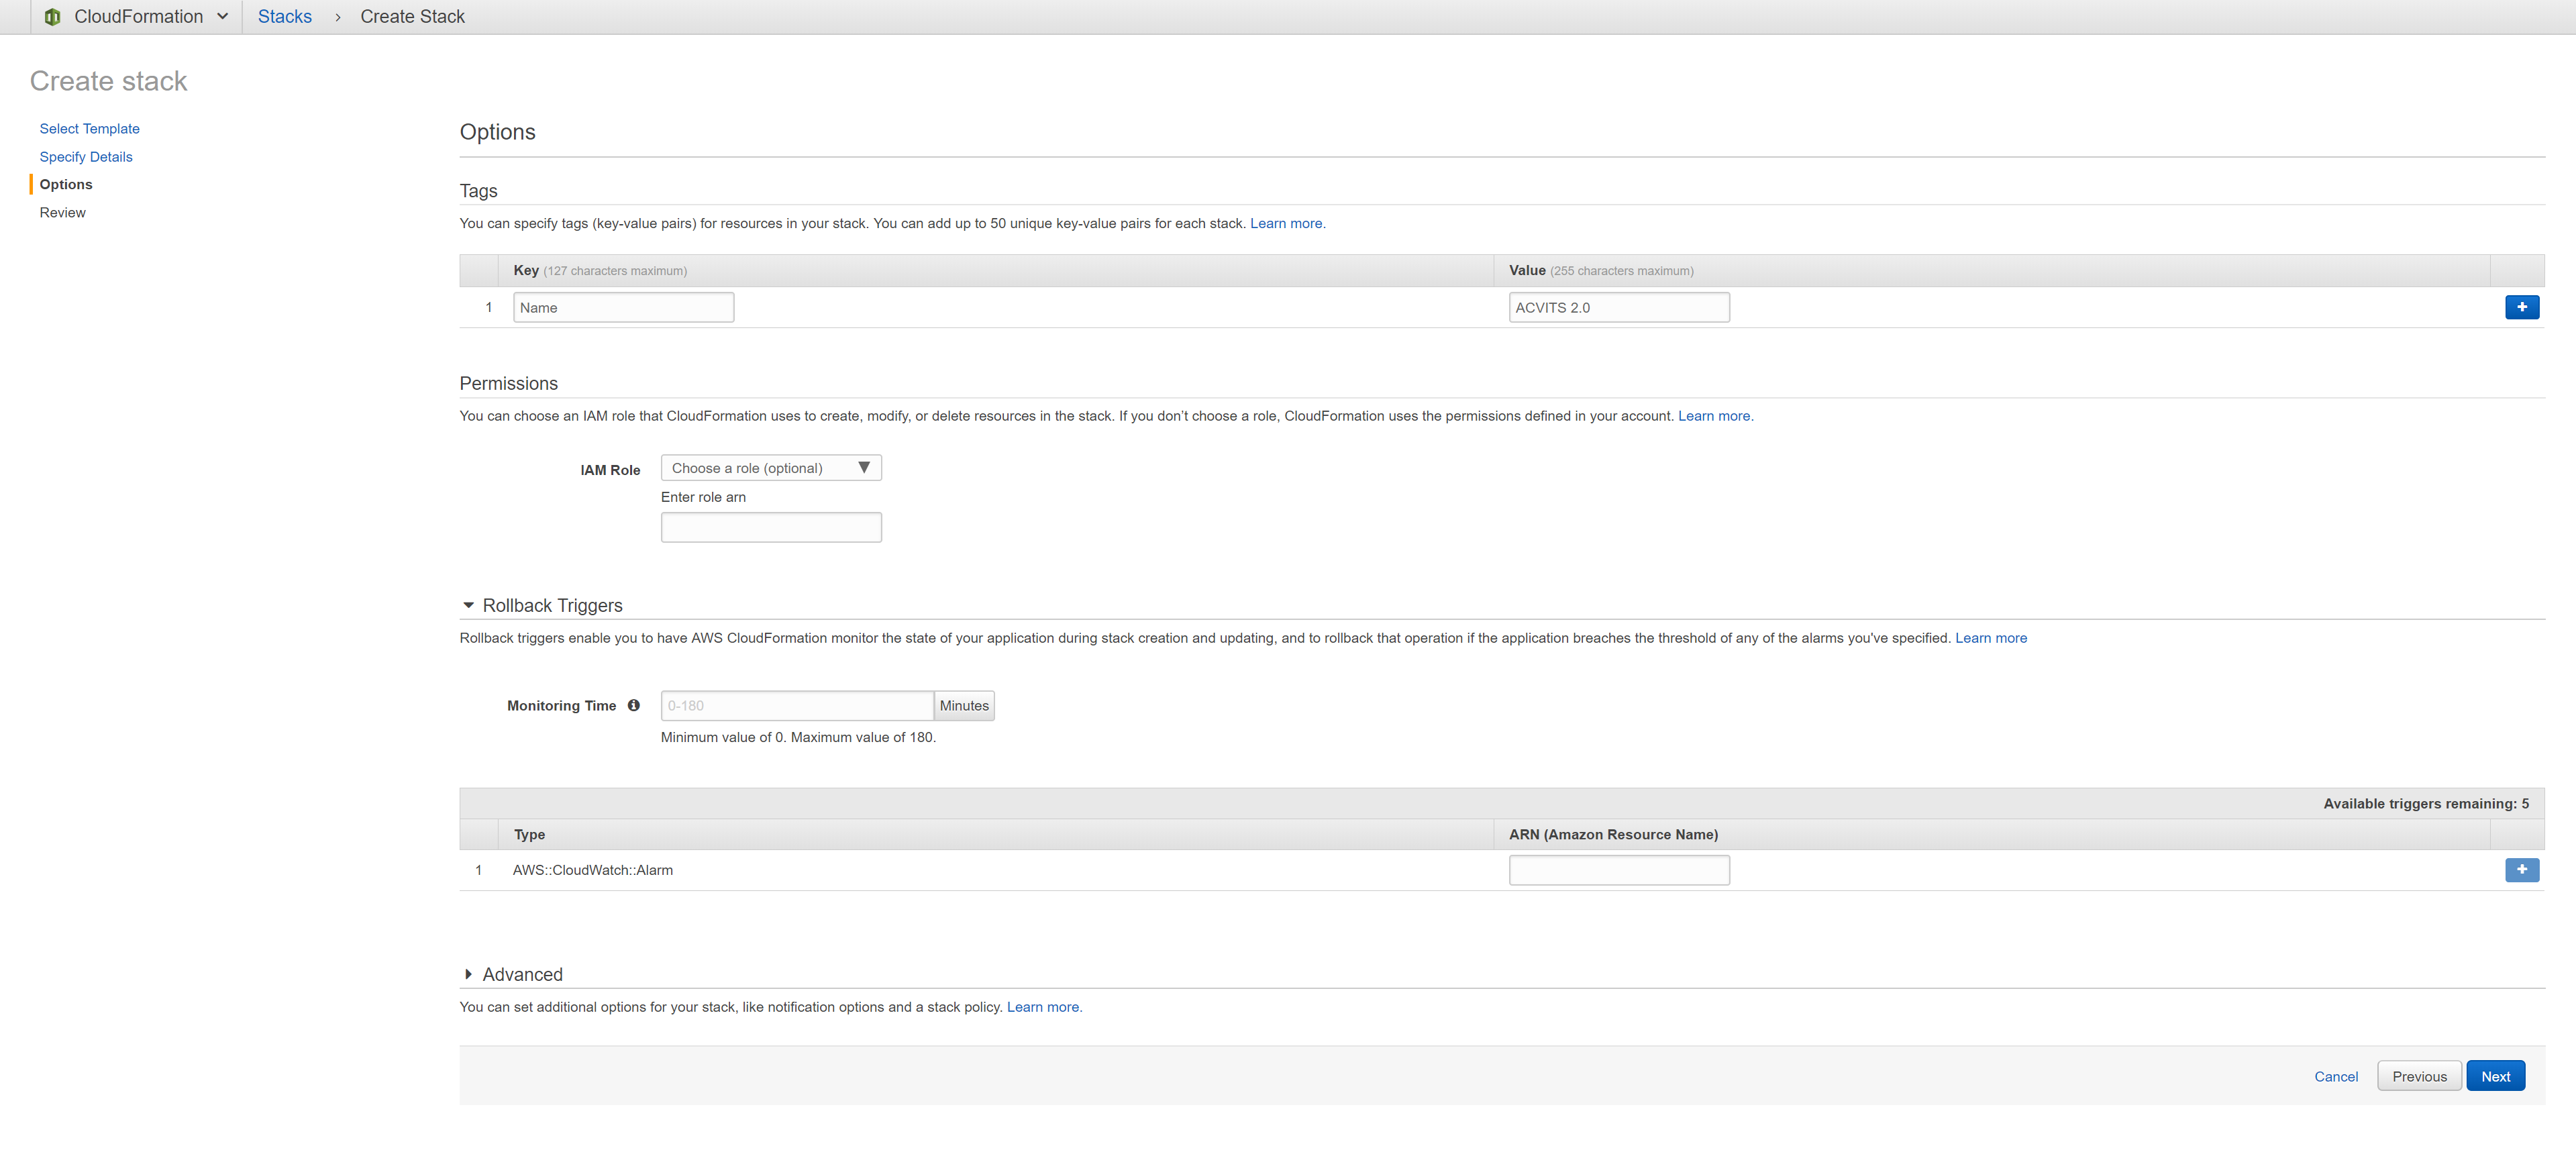
Update the tags. You may enter Key as “Name” and Value as “ACVITS 3.0”. This will give your EC2 instance name as “ACVITS 3.0”.
You may leave the other options values blank
Click Next button.
4. Review

Go through the template values you have entered. Under the “Capabilities” section, acknowledge the check box, and click “Create” button.
Monitor the stack creation process. Select the stack name and click the refresh button to monitor the stack creation process. When the stack status becomes “CREATE_COMPLETE”, the ACVITS software and the services are created and activated.
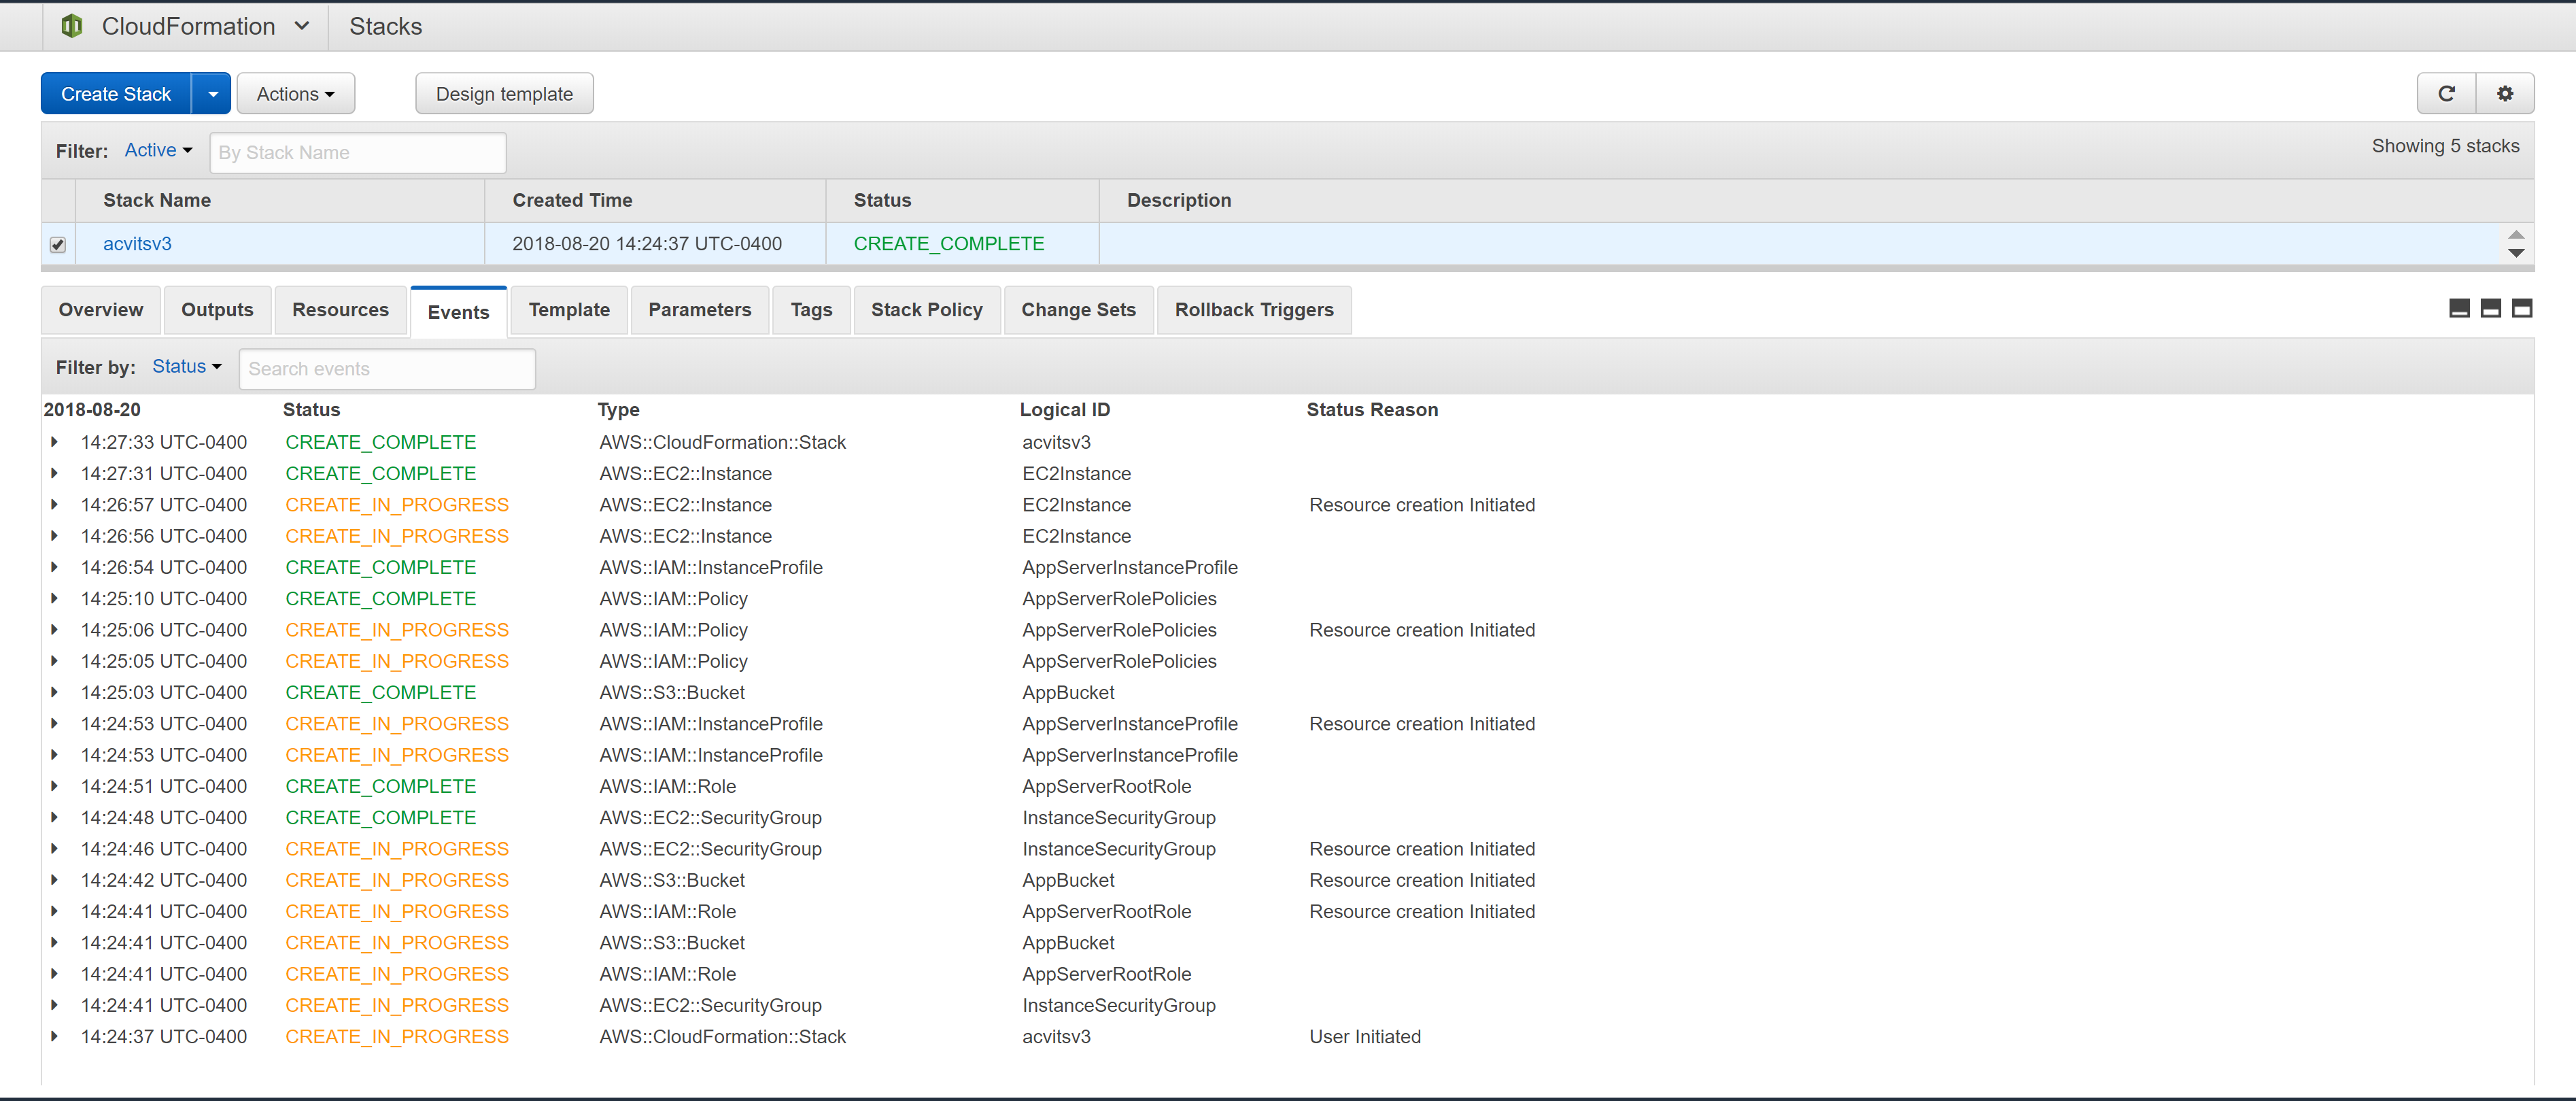
Click on the ‘Resources’ tab to find newly created resources.
Go to AWS Services page, under “COMPUTE” section, click the link “EC2”. On the newly built, EC2 watch for the ‘Status Checks’ with a green tick mark ‘2/2 checks passed’ message to appear.
The URL to access the application is the IPv4 Public IP of your newly created instance. You can find IPv4 Public IP from EC2 Dashboard, navigate to ‘Instances’ then select your instance. You will find the IPv4 Public IP at the bottom pane.
To map your domain address with the Public IP address, follow the link: https://acvits.info/domain-name-mapping-to-ec2/
After that implement SSL certificate on your domain address by following the steps listed at https://acvits.info/domain-address-ssl-certificate-implementation/
You can find the videos at https://www.acvits.info/faq
ACVITS Launch and Registration
- Open a browser tab and enter the Public IP address in the address bar to launch ACVITS. If you have a domain name, example mydomain.com which you want to map to this IP, then please follow the help links located at https://www.acvits.info/faq/
If you have received a message, “This site can’t be reached” due to http services not being up. You may wait for 3 minutes to retry and then restart the EC2 instance. To restart your EC2 instance, from EC2 Dashboard, select the EC2 instance name and click “Actions” menu, then select “Instance State” item and “Stop” item. Again, start the instance by selecting “Start” item from the “Instance State” menu item.
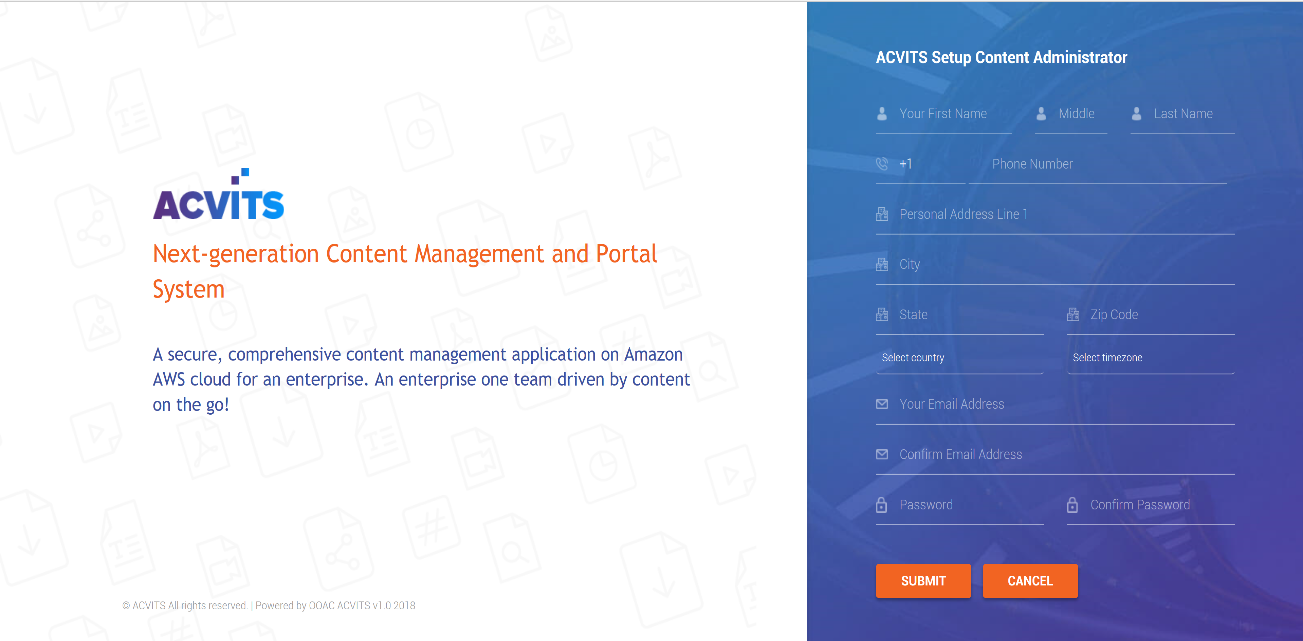
2. Fill appropriate values in all fields and then click on Submit.
3. A login screen appears, type your email address as the user name and password.
4. Specify the registered email address and password and sign-in to the ACVITS account.
Application Configuration
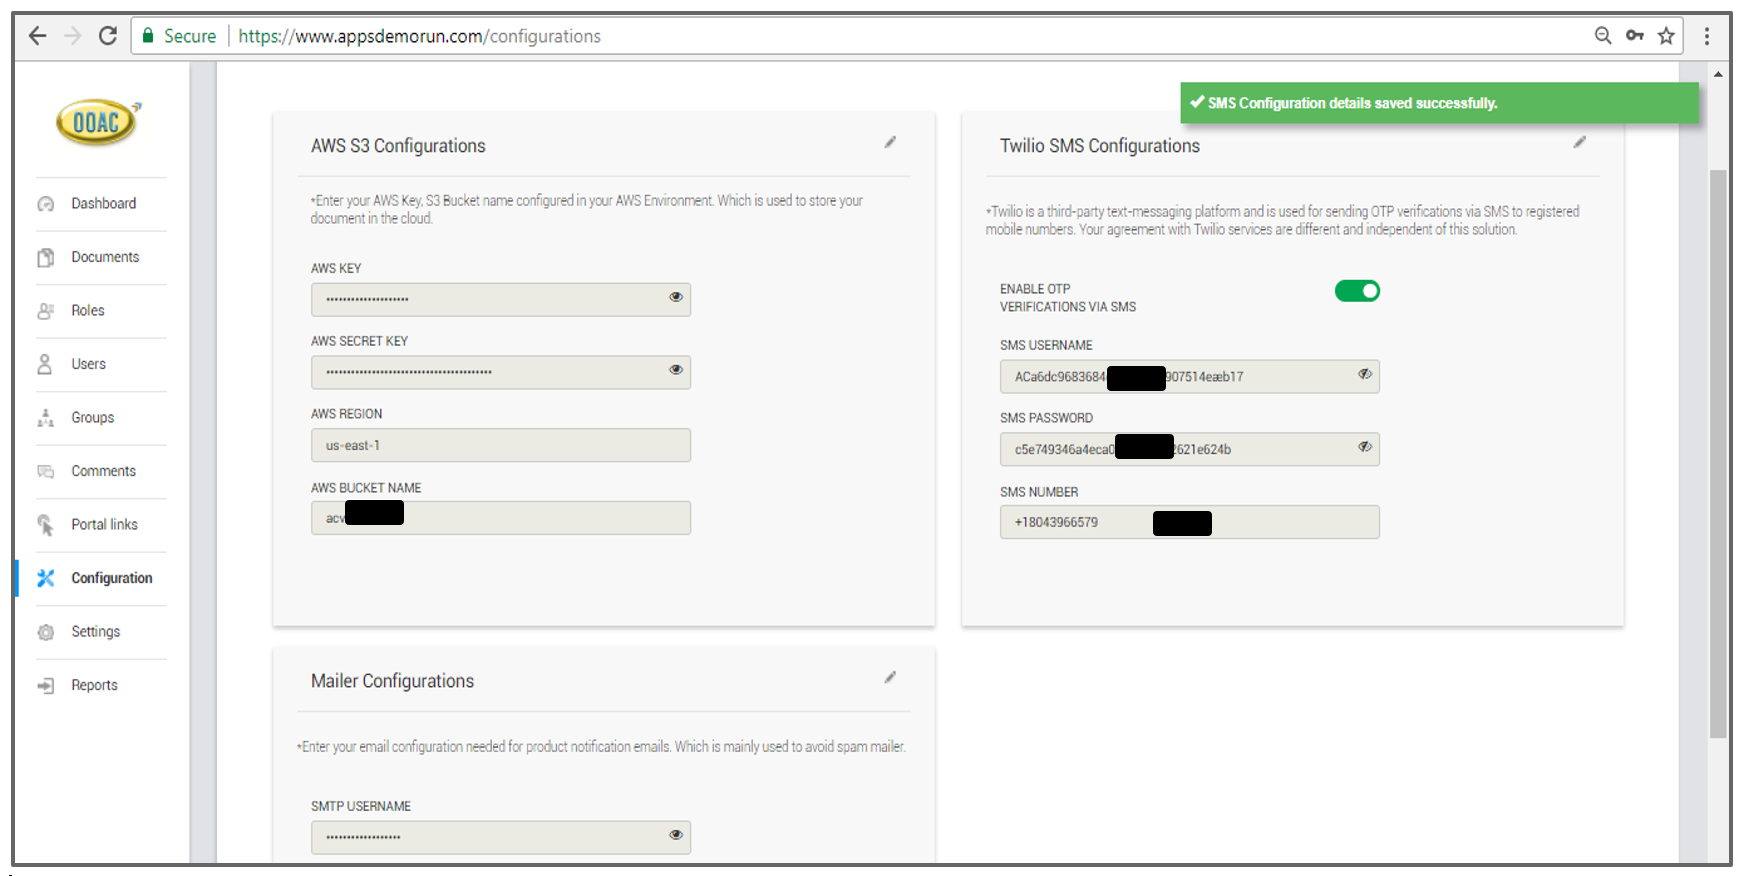
5. Your ACVITS account will be usable only after the details required in Configuration section are furnished.
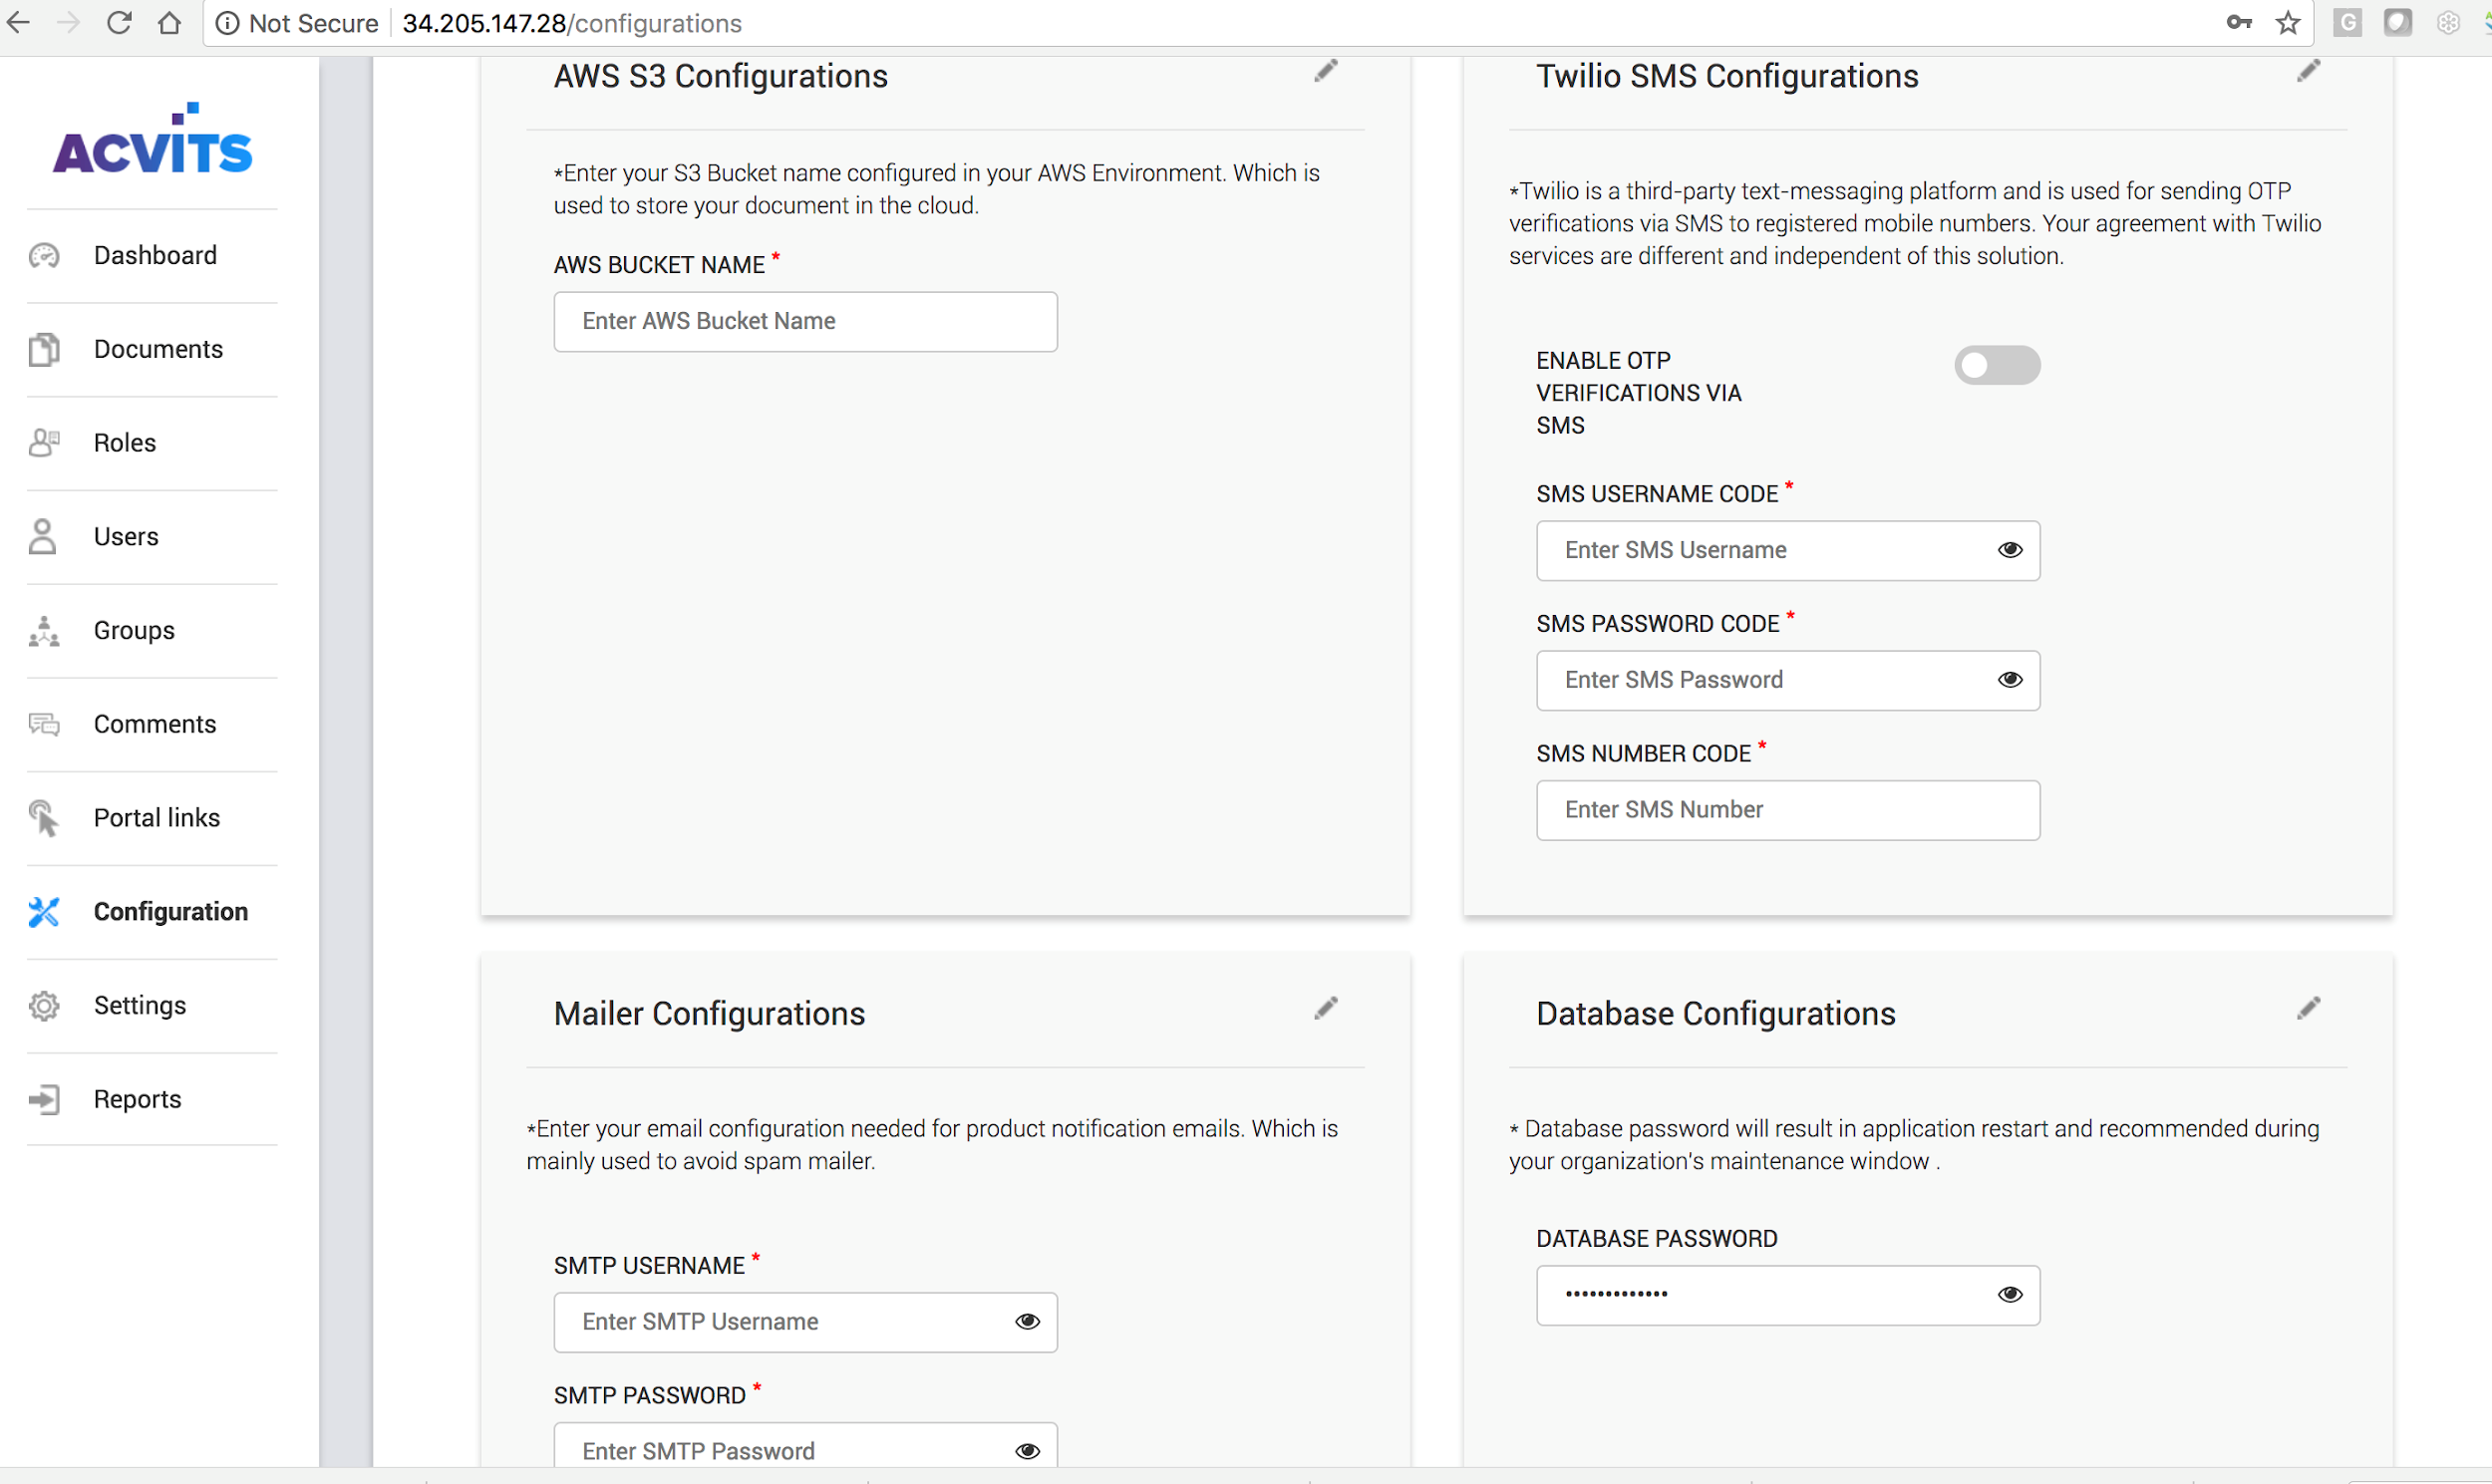
6. S3 Bucket configuration: Your S3 bucket value is AppBucket Physical ID value, found at the CloudFormation “Resources” tab. Click the pencil icon, enter the S3 bucket name, click test. If the test is successful, a confirmation message will be seen, and submit.
7. Proceed to Mailer Configurations section. After specifying email address as SMTP username, password and SMTP server details, click the Test button and Submit button to save the record. Click on the pencil icon to edit the record.
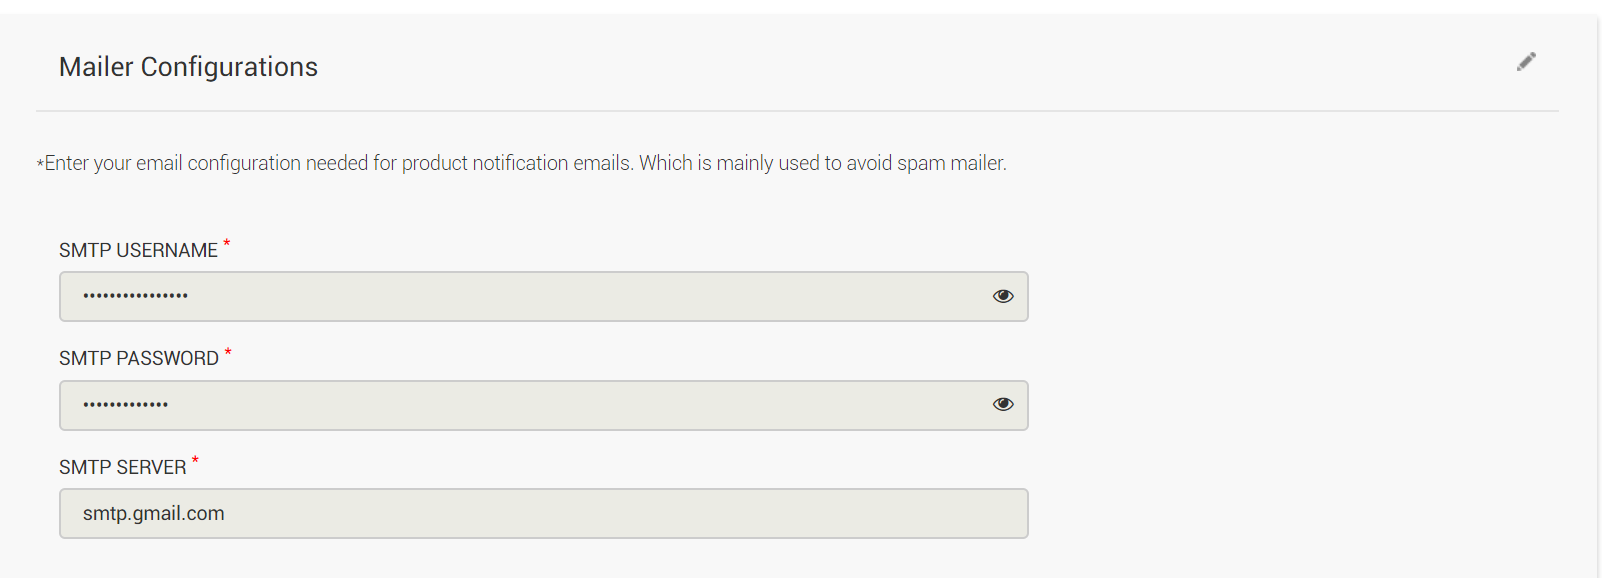
Important: If you are using Google’s SMTP Server for mailer configuration and the test does not result in success, then make sure to check your mailbox corresponding to the specified email address. You will receive a security alert email from Google. Please grant permissions to ACVITS by switching the less secure option to ON via the settings provided in email.
8. A confirmation message will appear when the test is successful.
9. Click on Submit to save the SMTP settings.
10. (OPTIONAL) Two-factor authentication using Twilio account to deliver OTP messages via SMS. This is an optional service and can be skipped if you wish to receive OTP only by email. If you wish to skip this option, then ignore steps until steps 20. Please follow the steps outlined below to setup your own Twilio account.
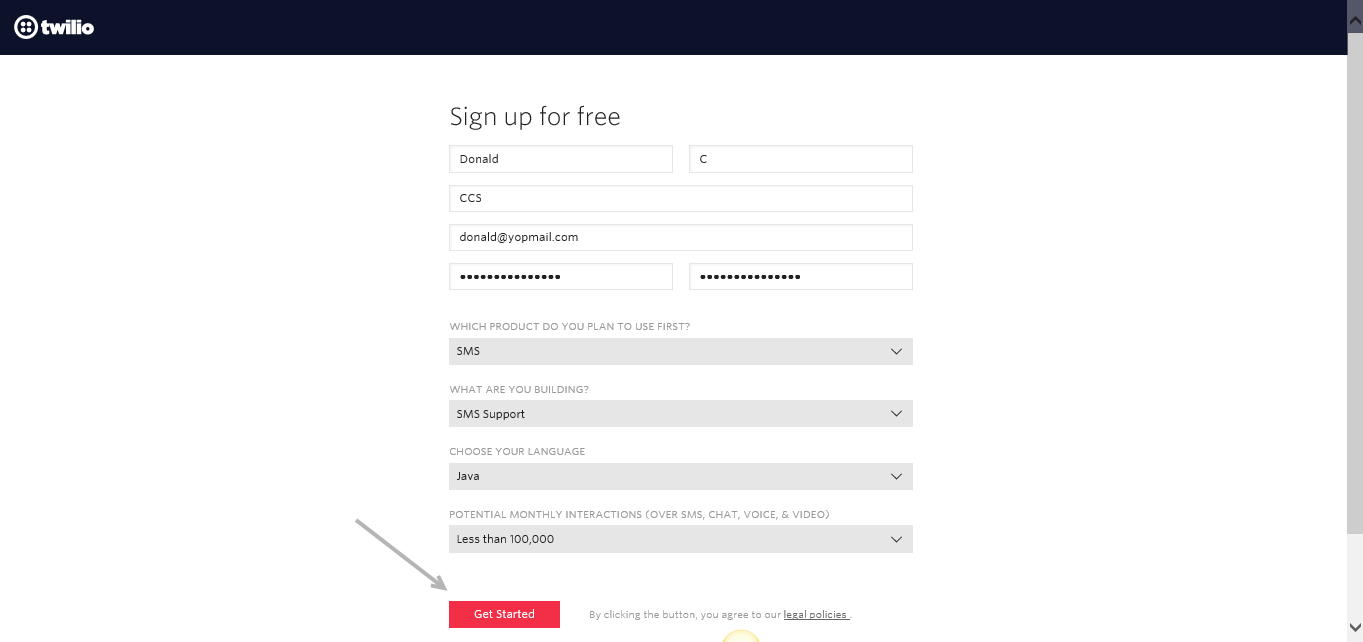
a). Launch https://www.twilio.com/ and go to the Sign Up form.
b). Specify relevant information in all Sign Up fields and click on Get Started.
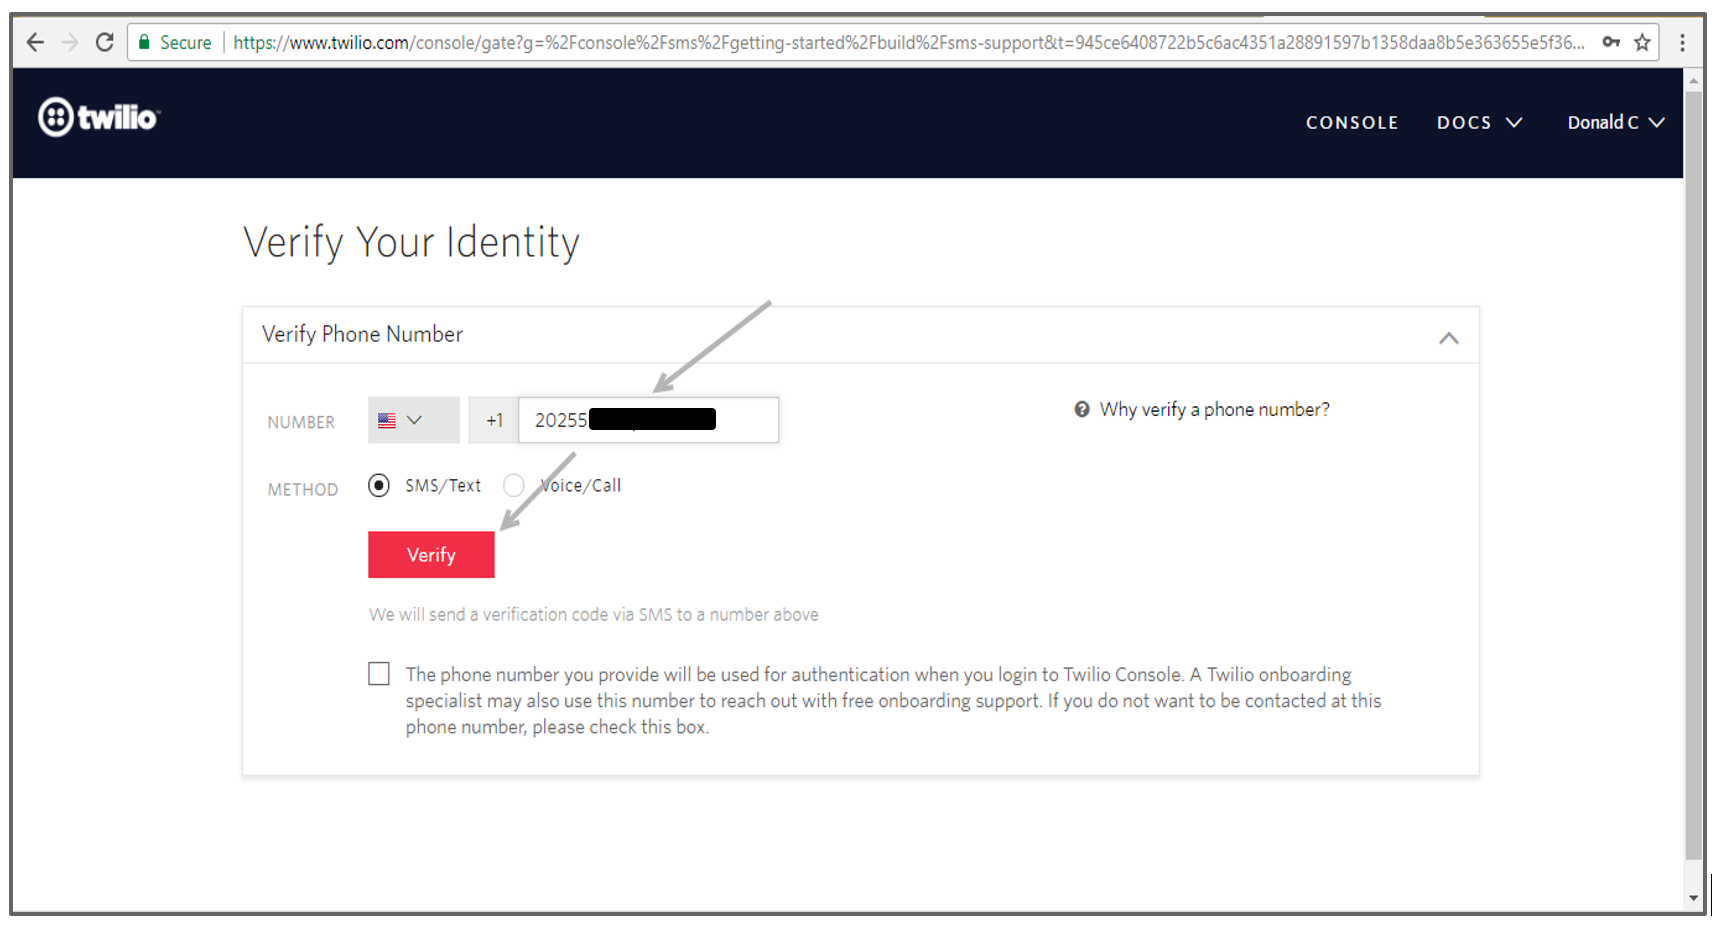
c). In the subsequent step, submit your phone number and click on Verify.
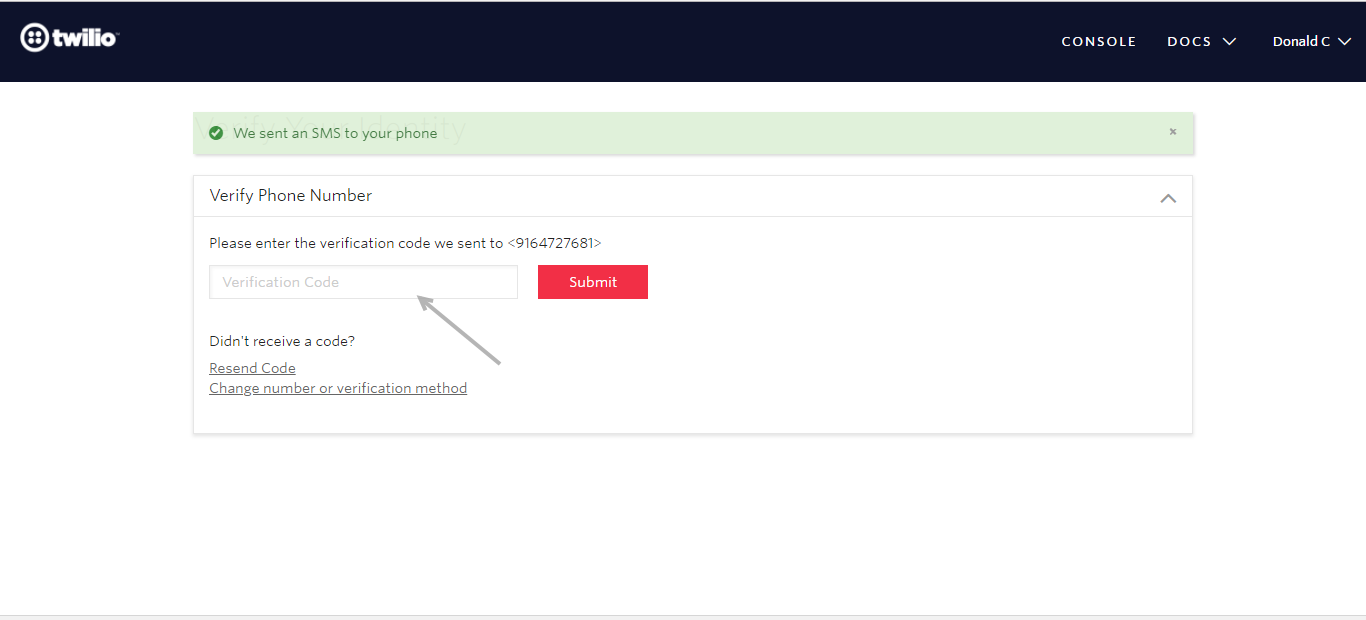
d). In the subsequent step, enter the OTP number delivered to your phone number and click on Submit.
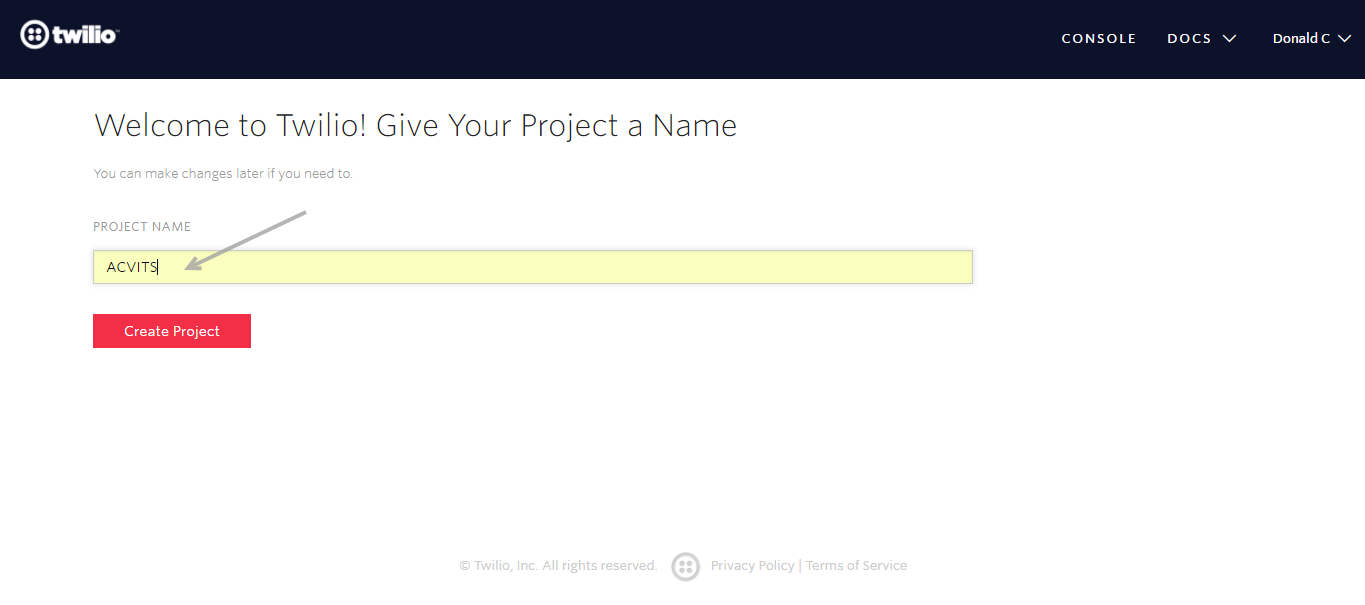
e). In the next step, specify a project name and click the Create Project button.
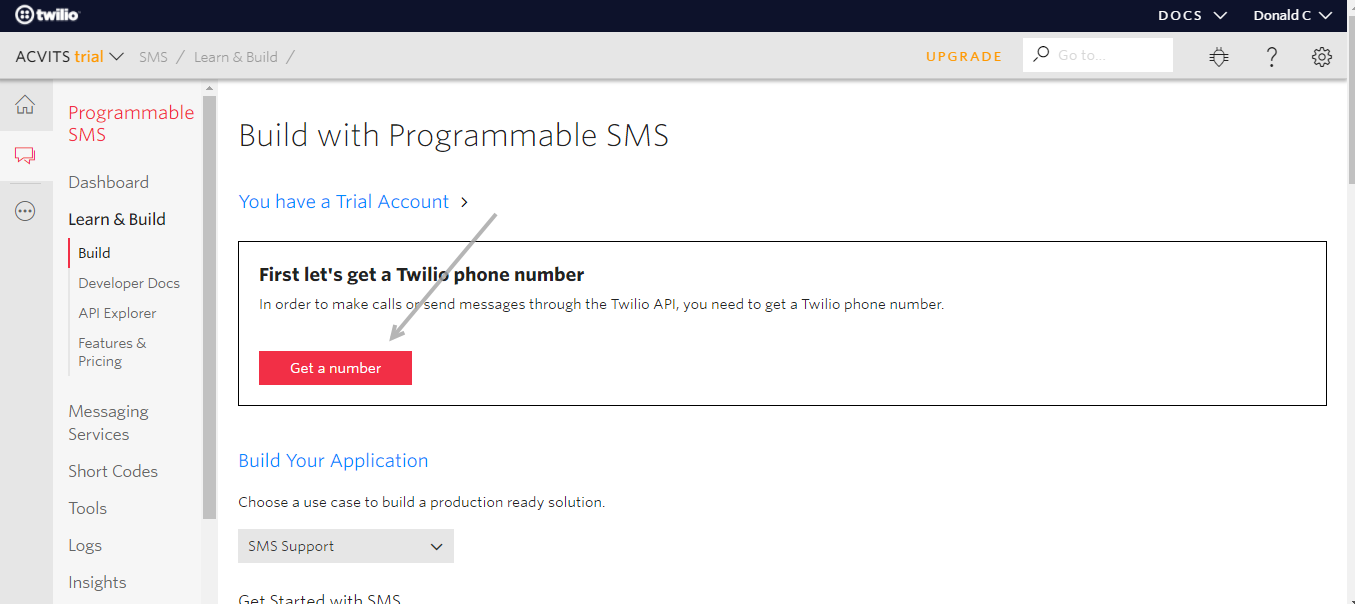
f). As soon as the project is created, you will be redirected to the step to get a Twilio phone number. Click on the Get a number button to obtain the number.
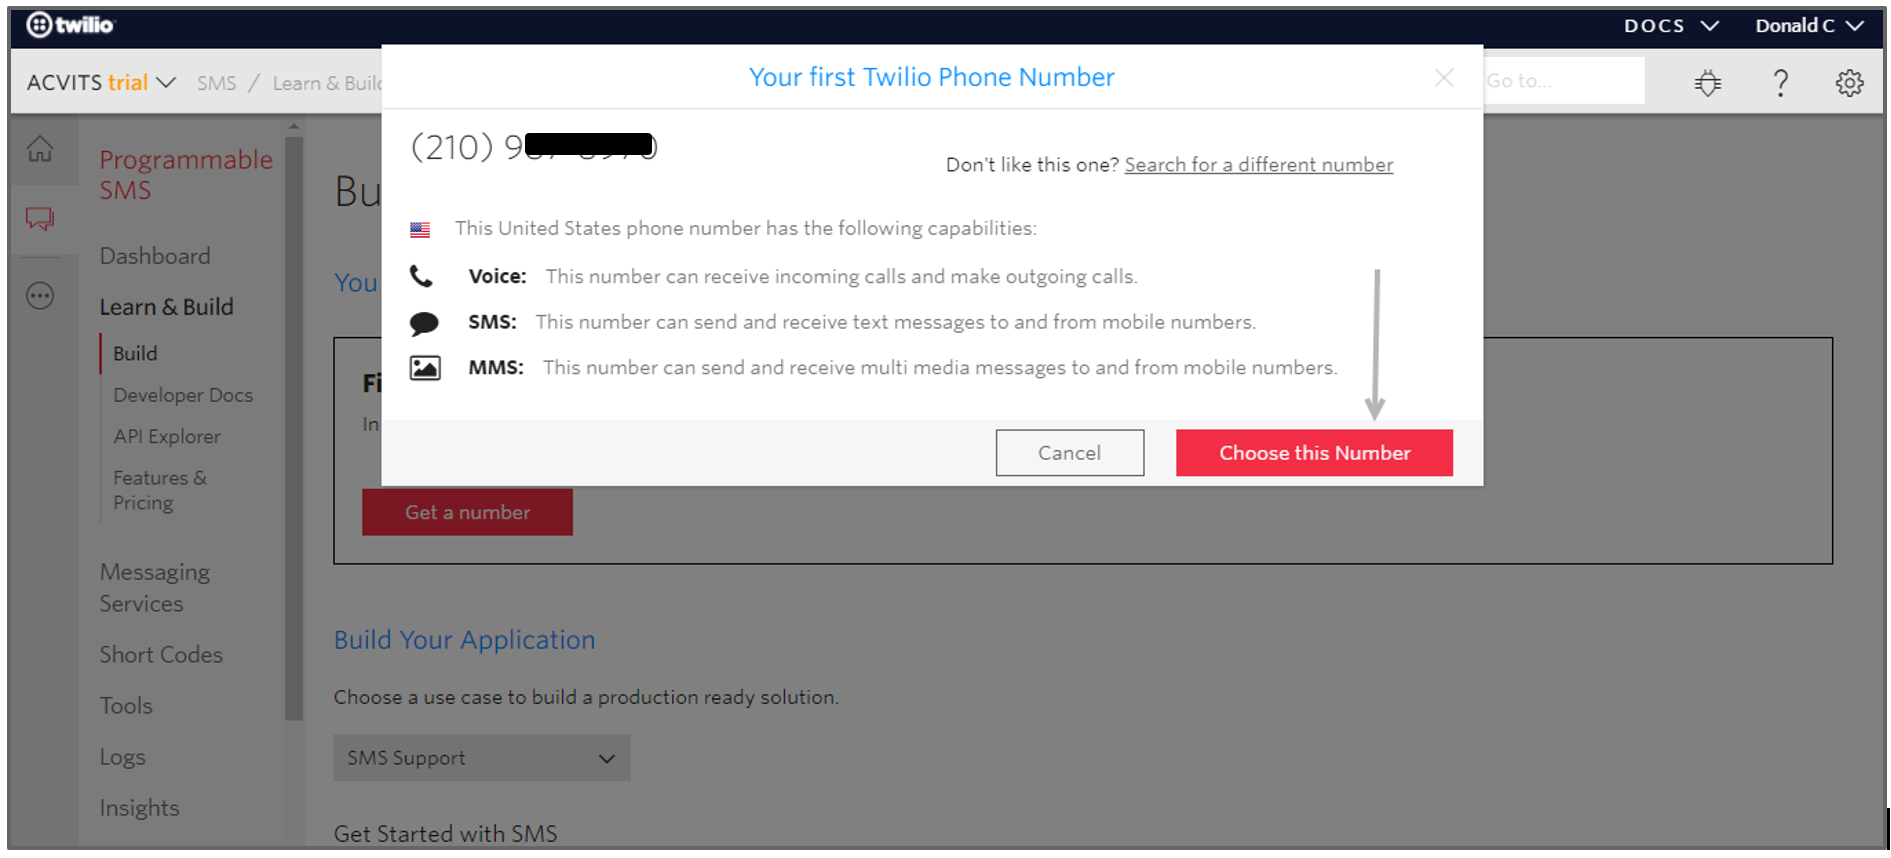
g). Twilio will display the number it generated. Take note of the phone number and then click on Choose this Number to confirm your selection.
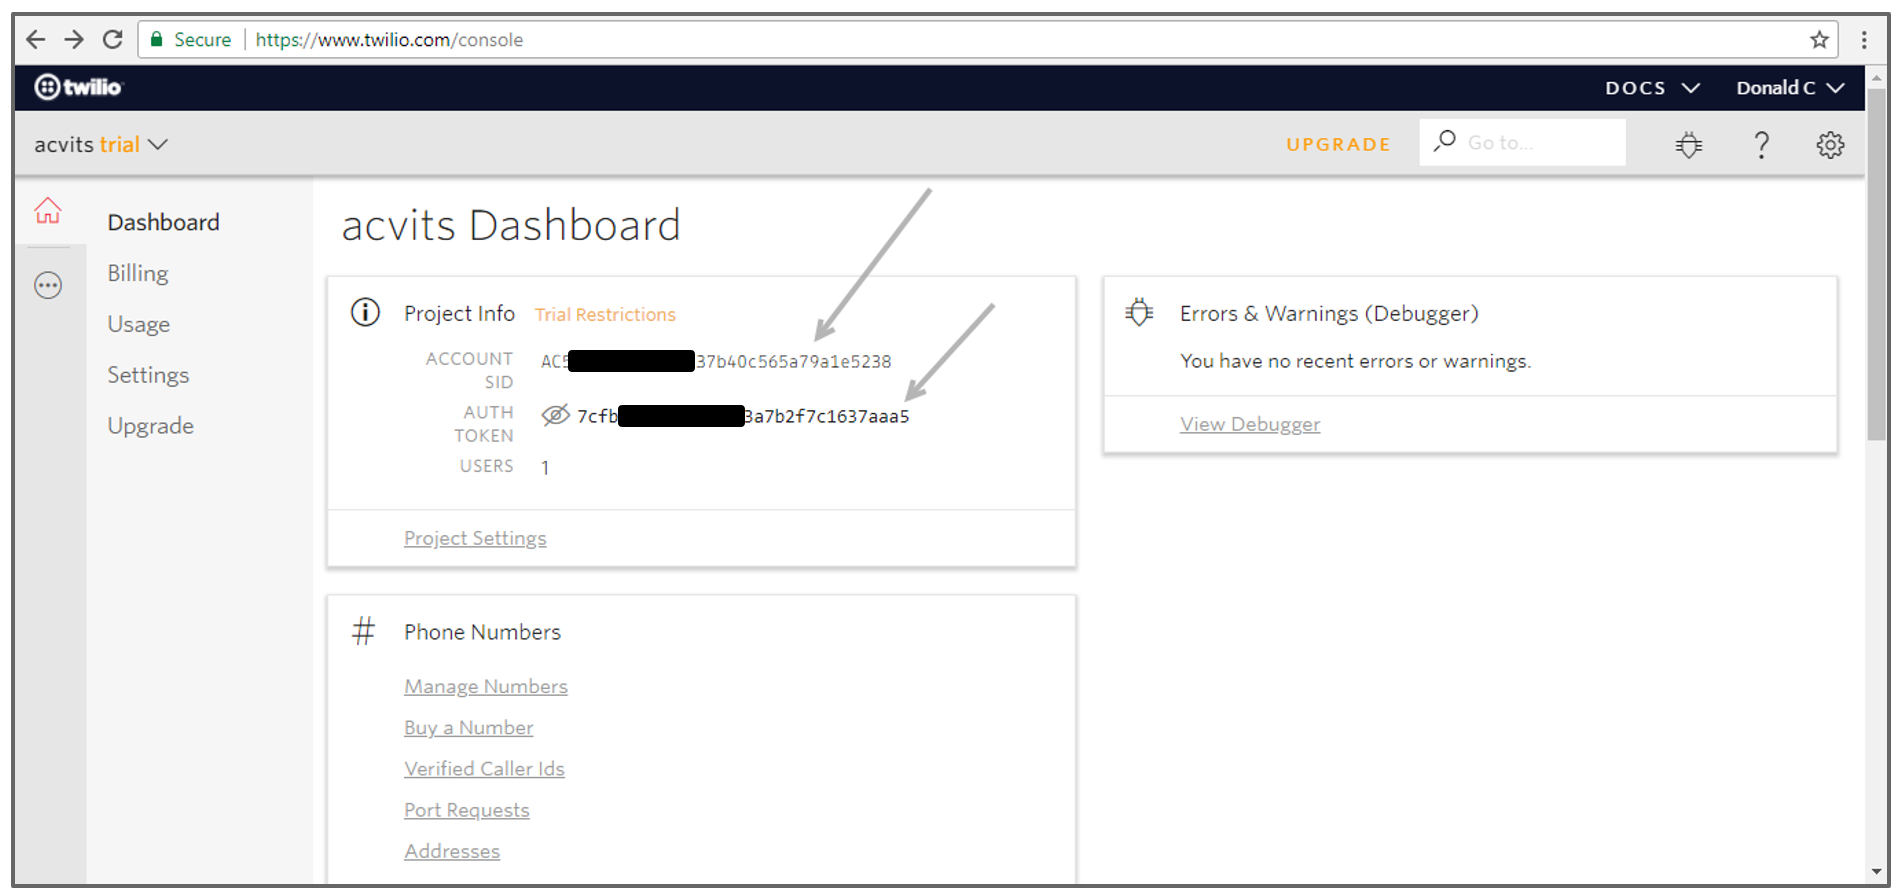
h). Copy the Account SID, Auth Token from the Twilio Dashboard and return to your ACVITS application.
i). Paste the corresponding copied values into SMS Username and SMS Password fields. Also enter the Twilio phone number in the field provided and click on Test to verify the configuration is working.
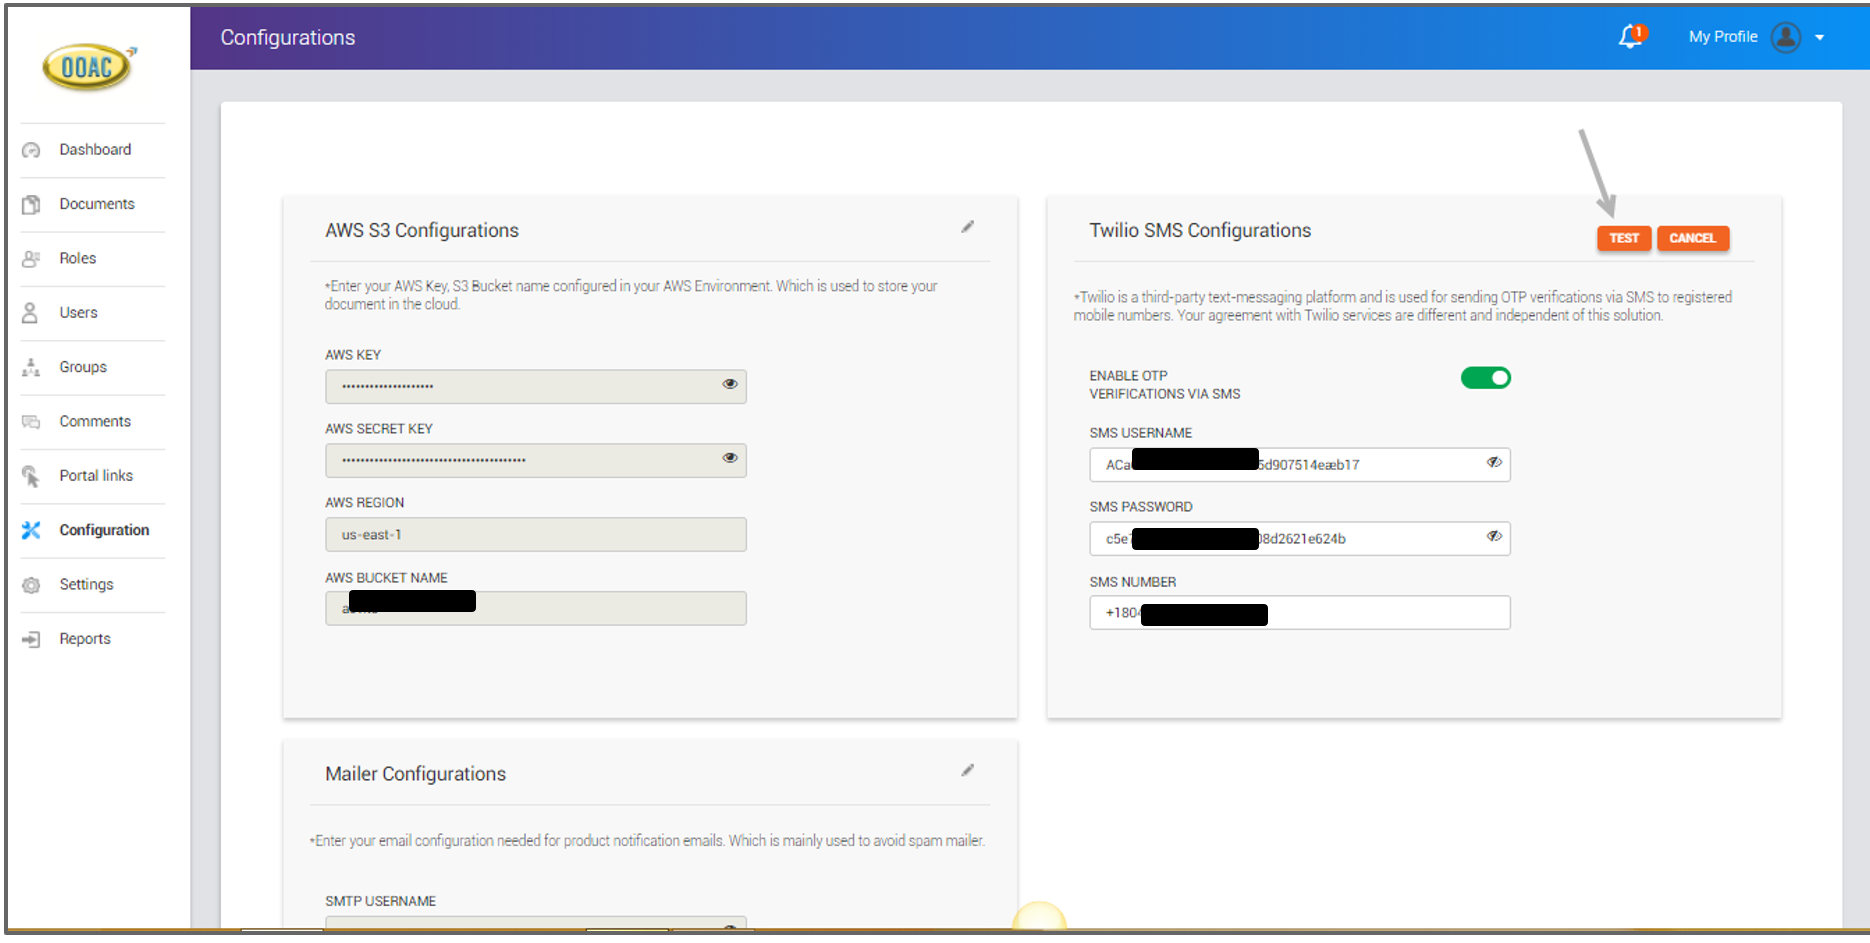
j). If a confirmation message is displayed you can rest assure that Twilio connection is successful.

k). Click on the Submit to Save the Twilio Configuration.
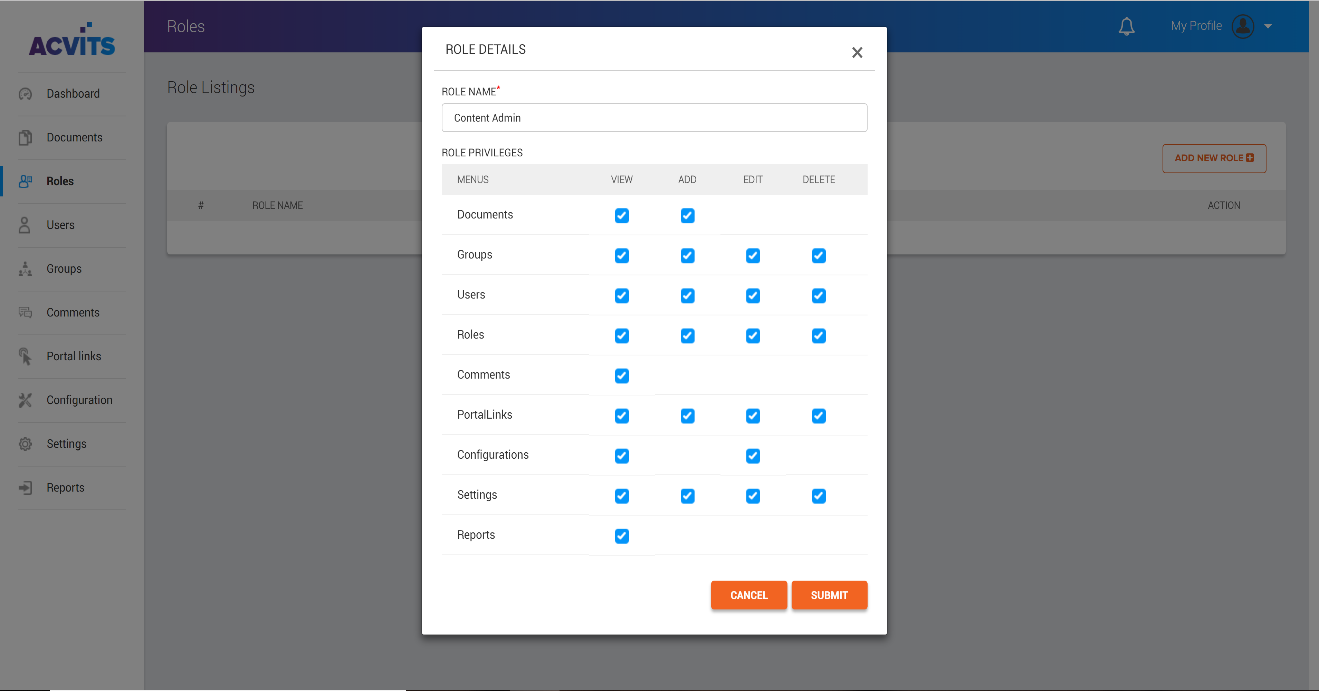
11. Create an ACVITS application role. Choose ‘Role’ from the left side bar and create a Content Administrator role with all the privileges as shown below.
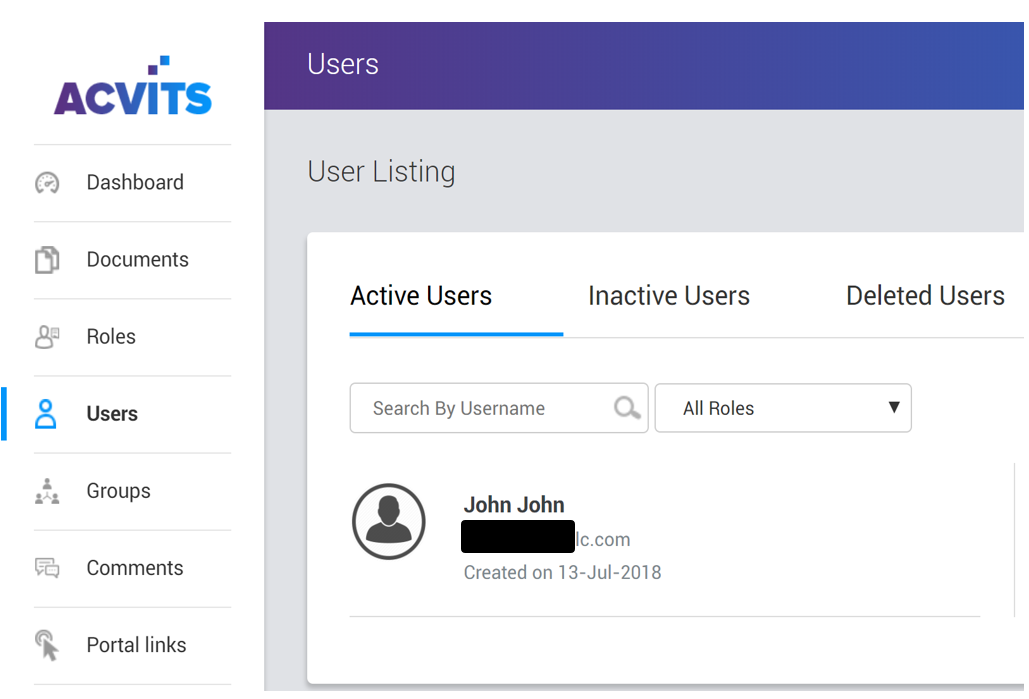
12. From the left side menu, select “Users” and highlight registered user and select the pencil icon to edit the information.
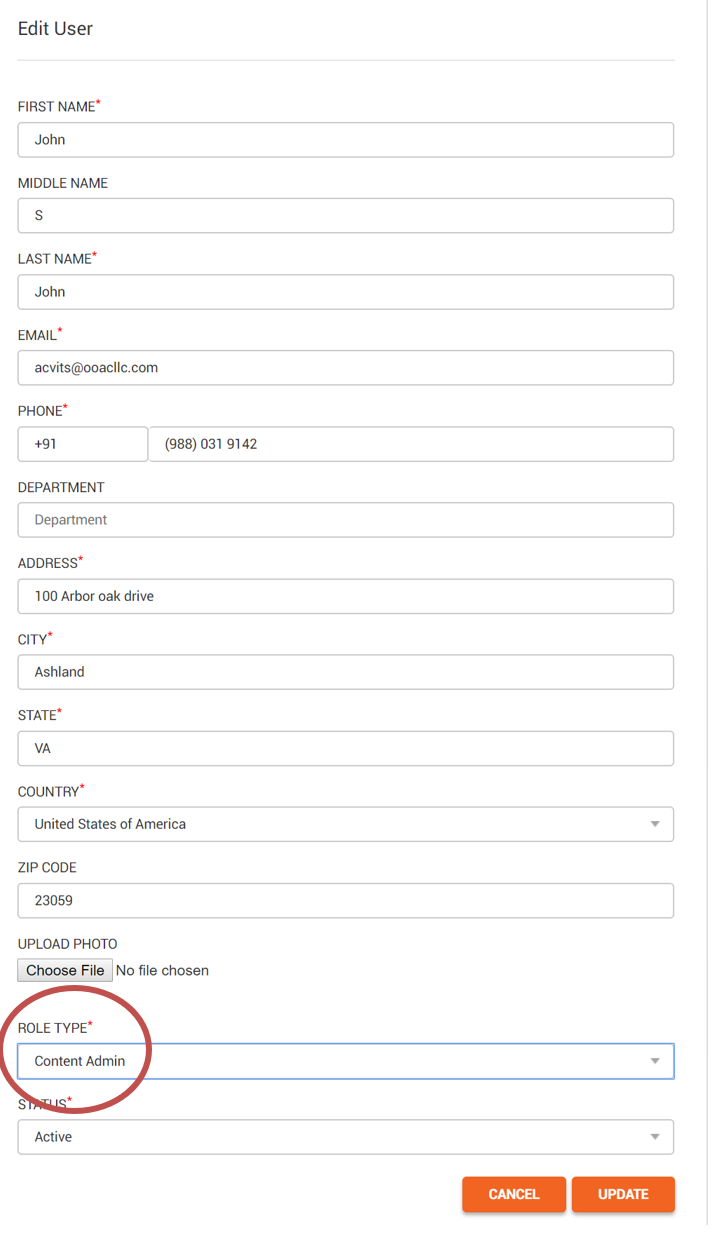
13. Scroll to the bottom of the user information and select role type with newly created username, and click update button.
14. ACVITS is now fully configured and operational. User can continue to use the system in a full-fledged manner.
(Optional) Monitoring and Protection
1) Select EC2 instance, from the Actions select CloudWatch Monitoring >> Add/Edit Alarms.
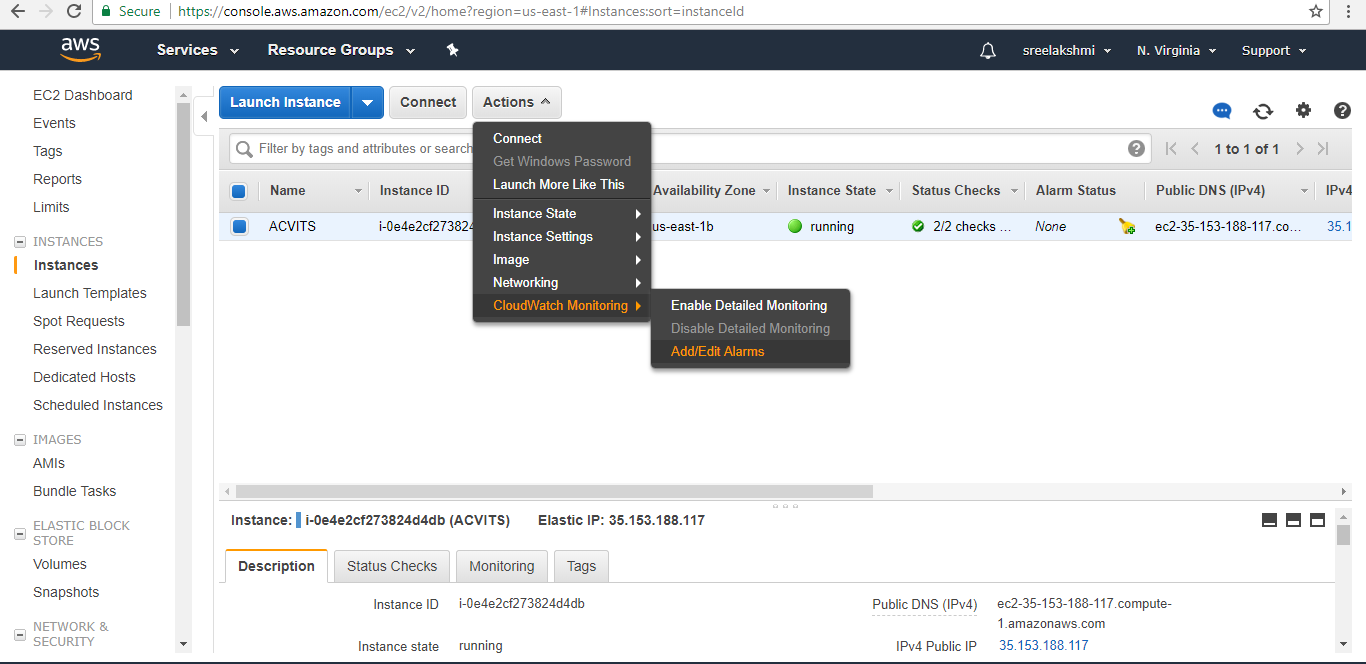
2) As a precautionary measure, create an alarm so that you are notified whenever CPU Utilization peaks. Please go through the next set of steps to configure alarm and receive notifications via email.
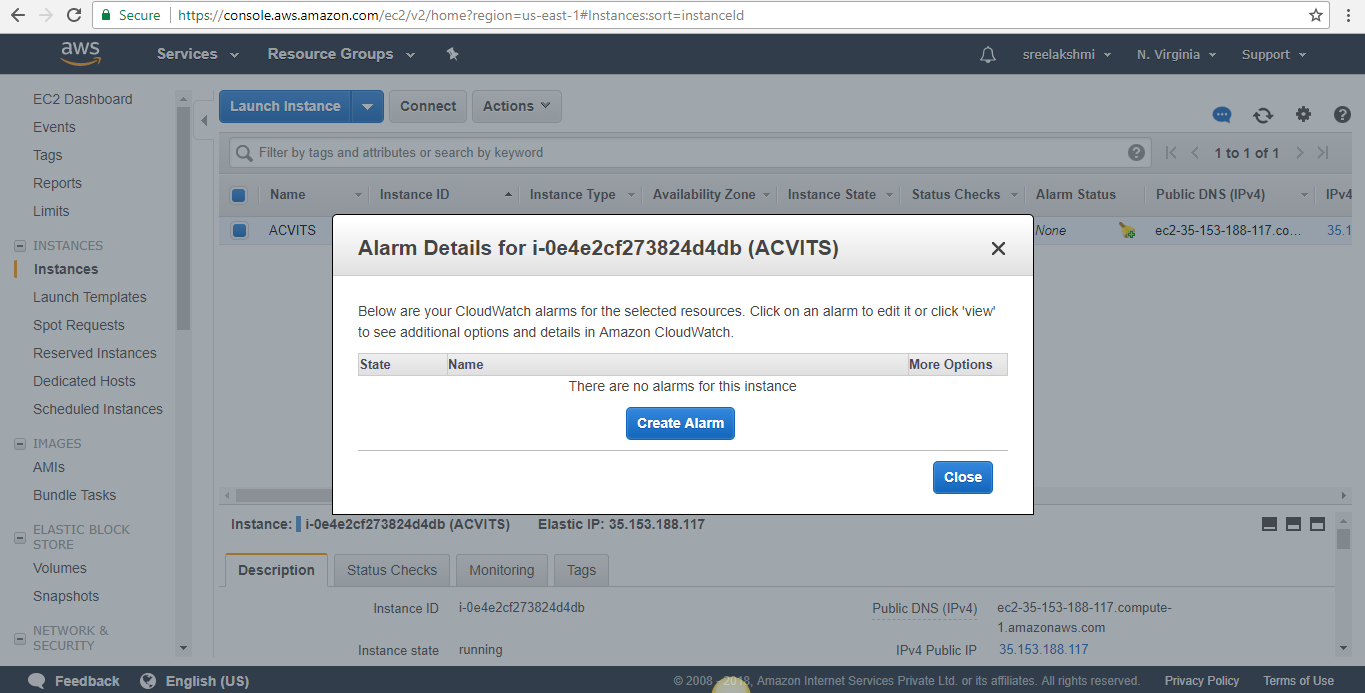
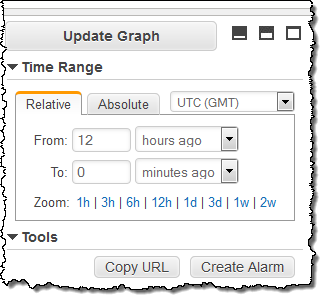
3) Click on Create Alarm.
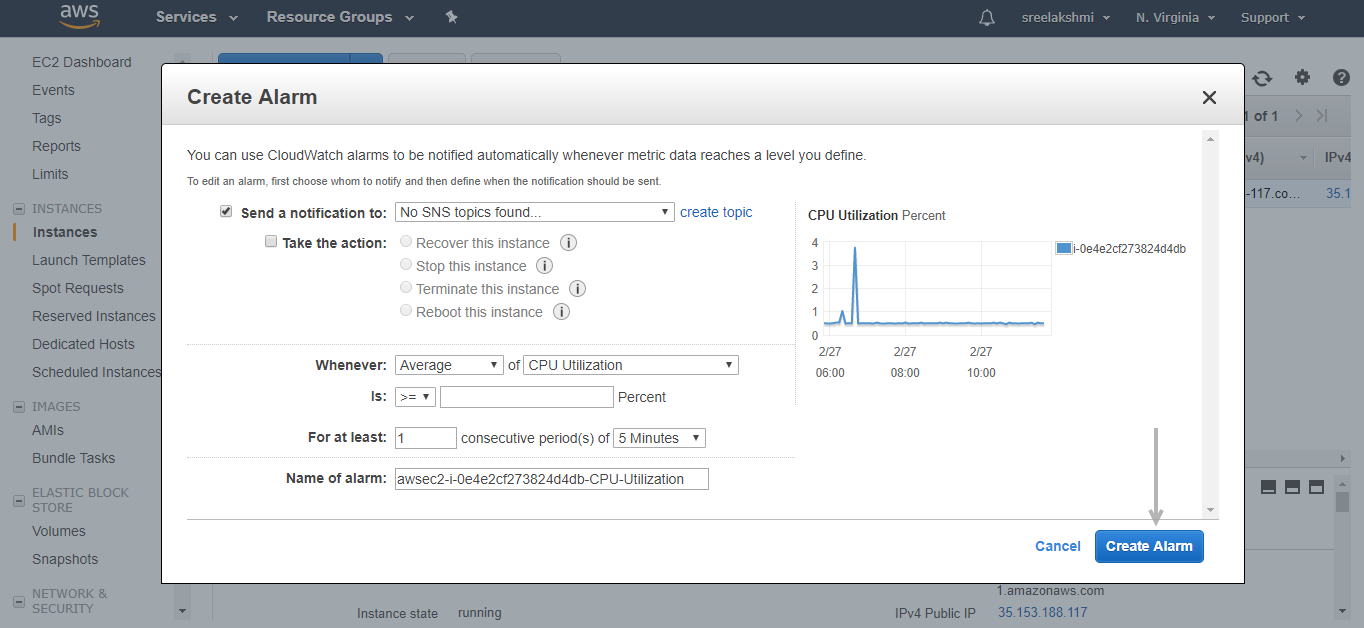
4) Specify your email address and select the option corresponding to Stop this instance action and click on Create Alarm button.
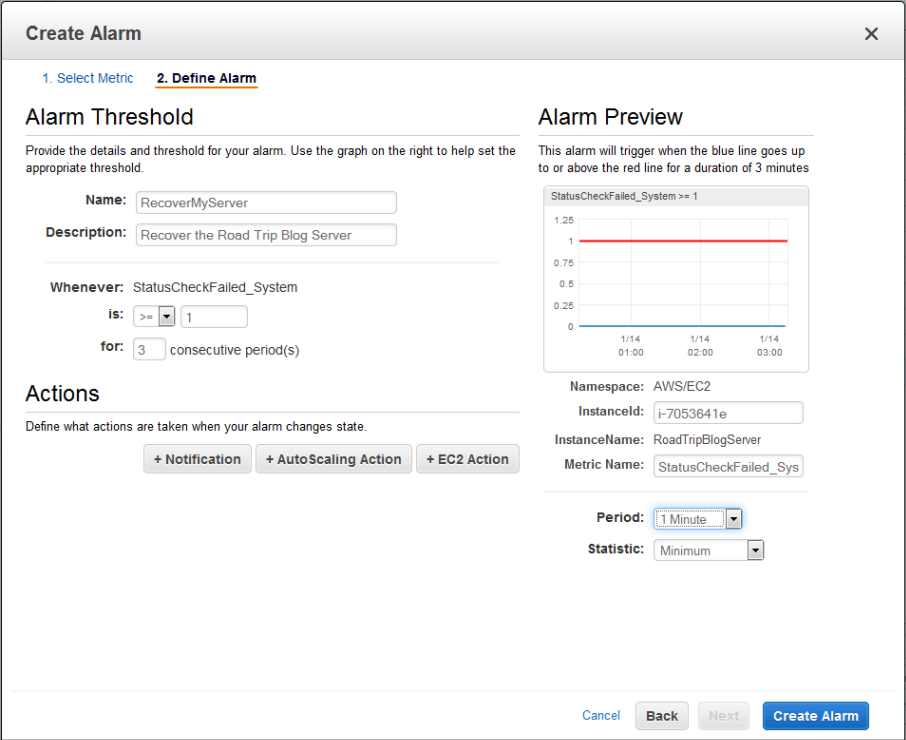
5) Open https://console.aws.amazon.com/cloudwatch/ and Create another CloudWatch alarm for the metric StatusCheckFailed_System . First, find and select the metric ‘StatusCheckFailed_System’ for your instance.

Next, click on the Next button and enter the email list for notification,also under EC2 action, Choose ‘Recover this instance’
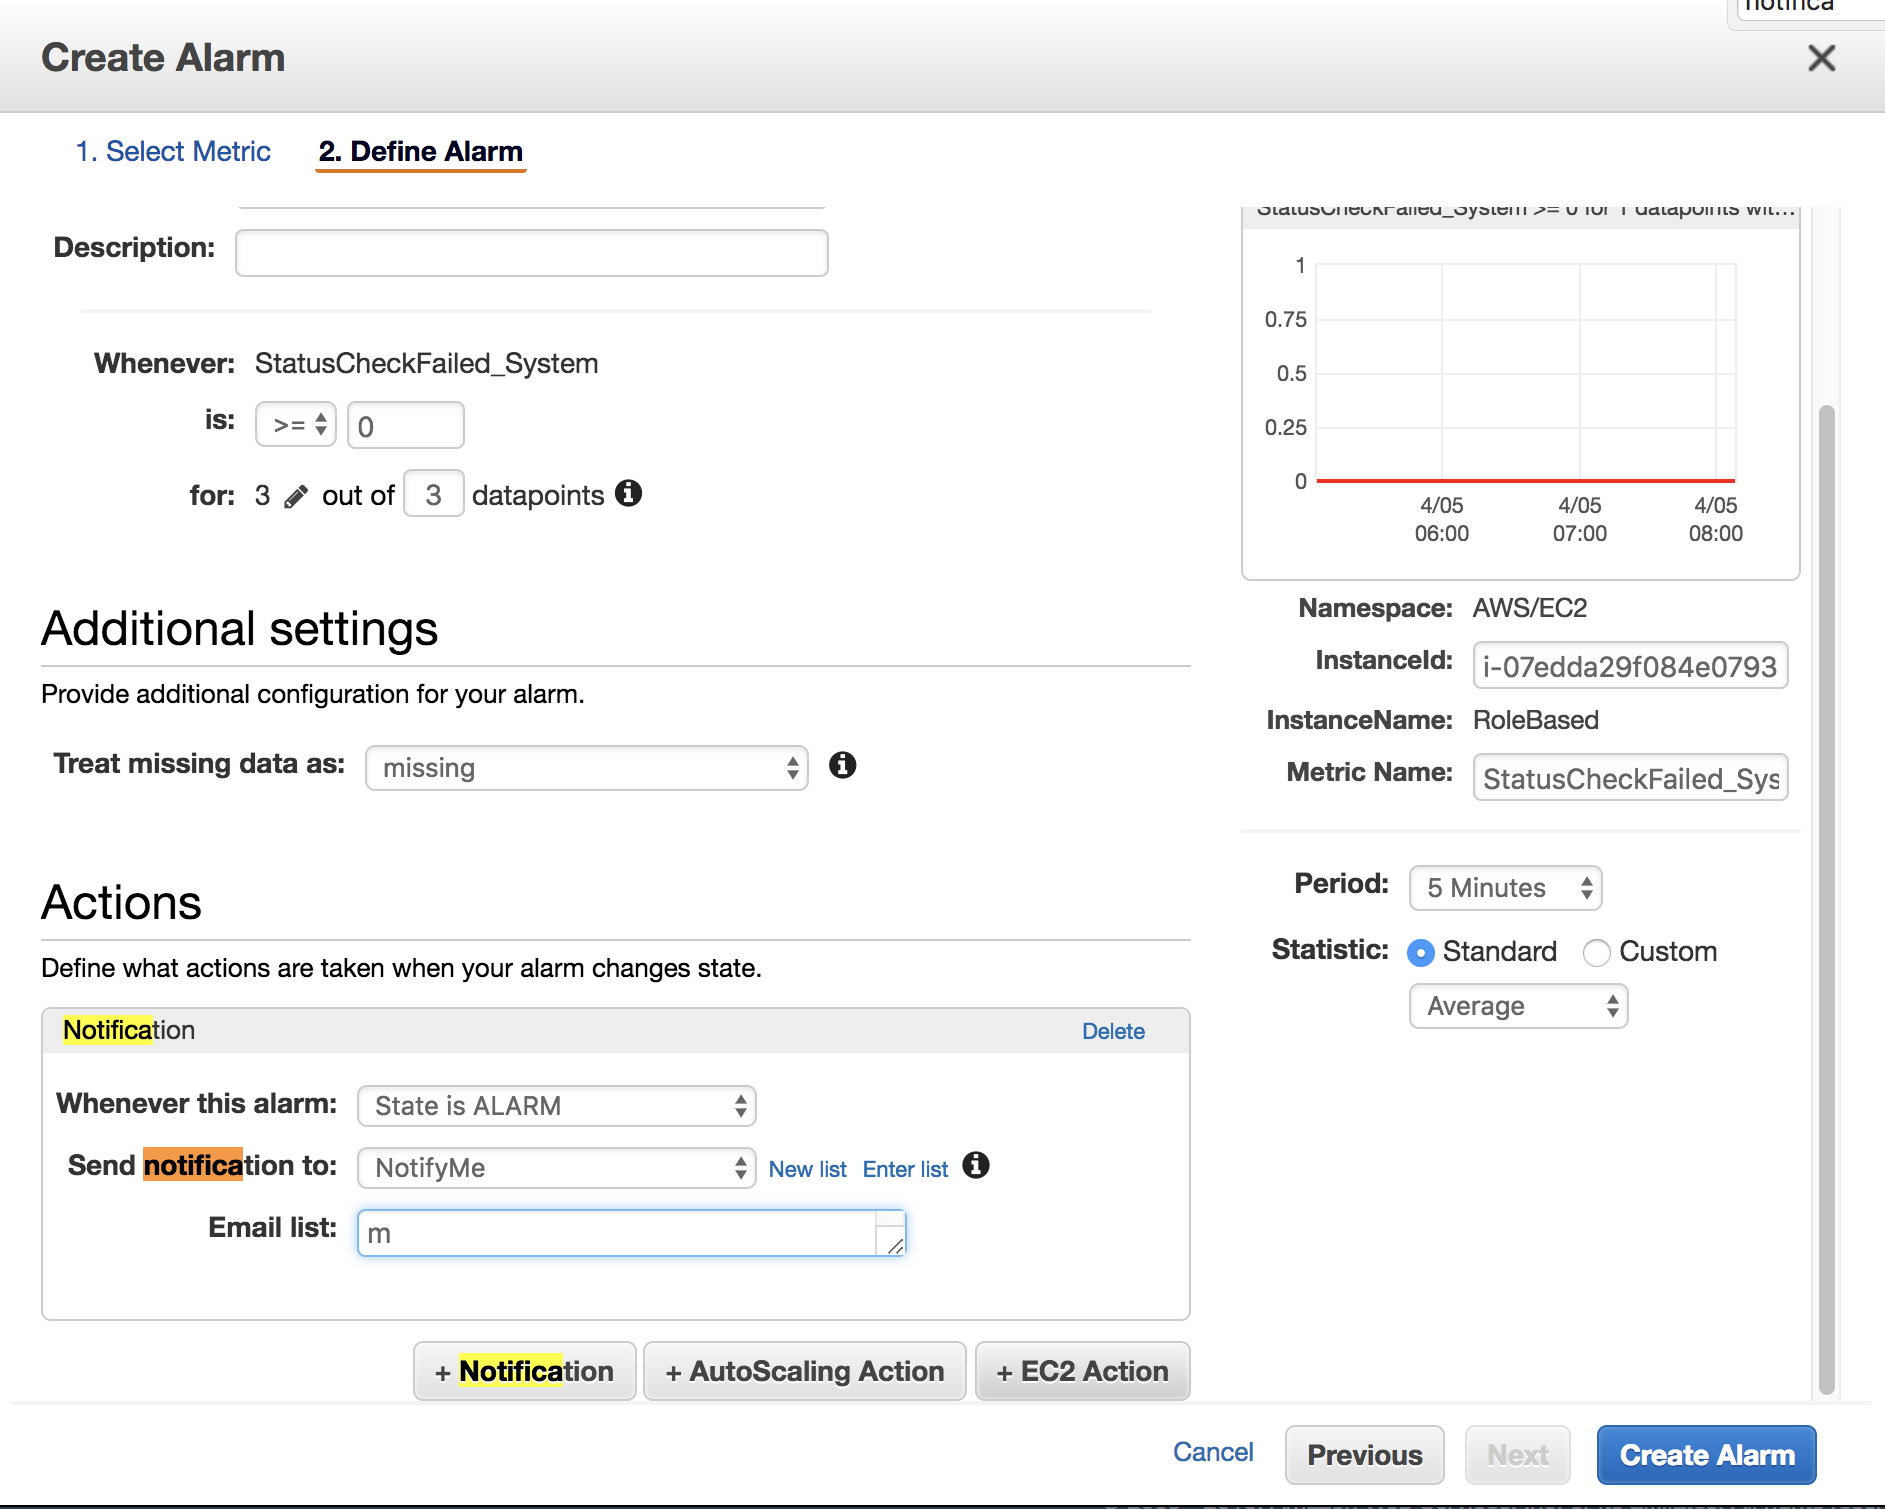
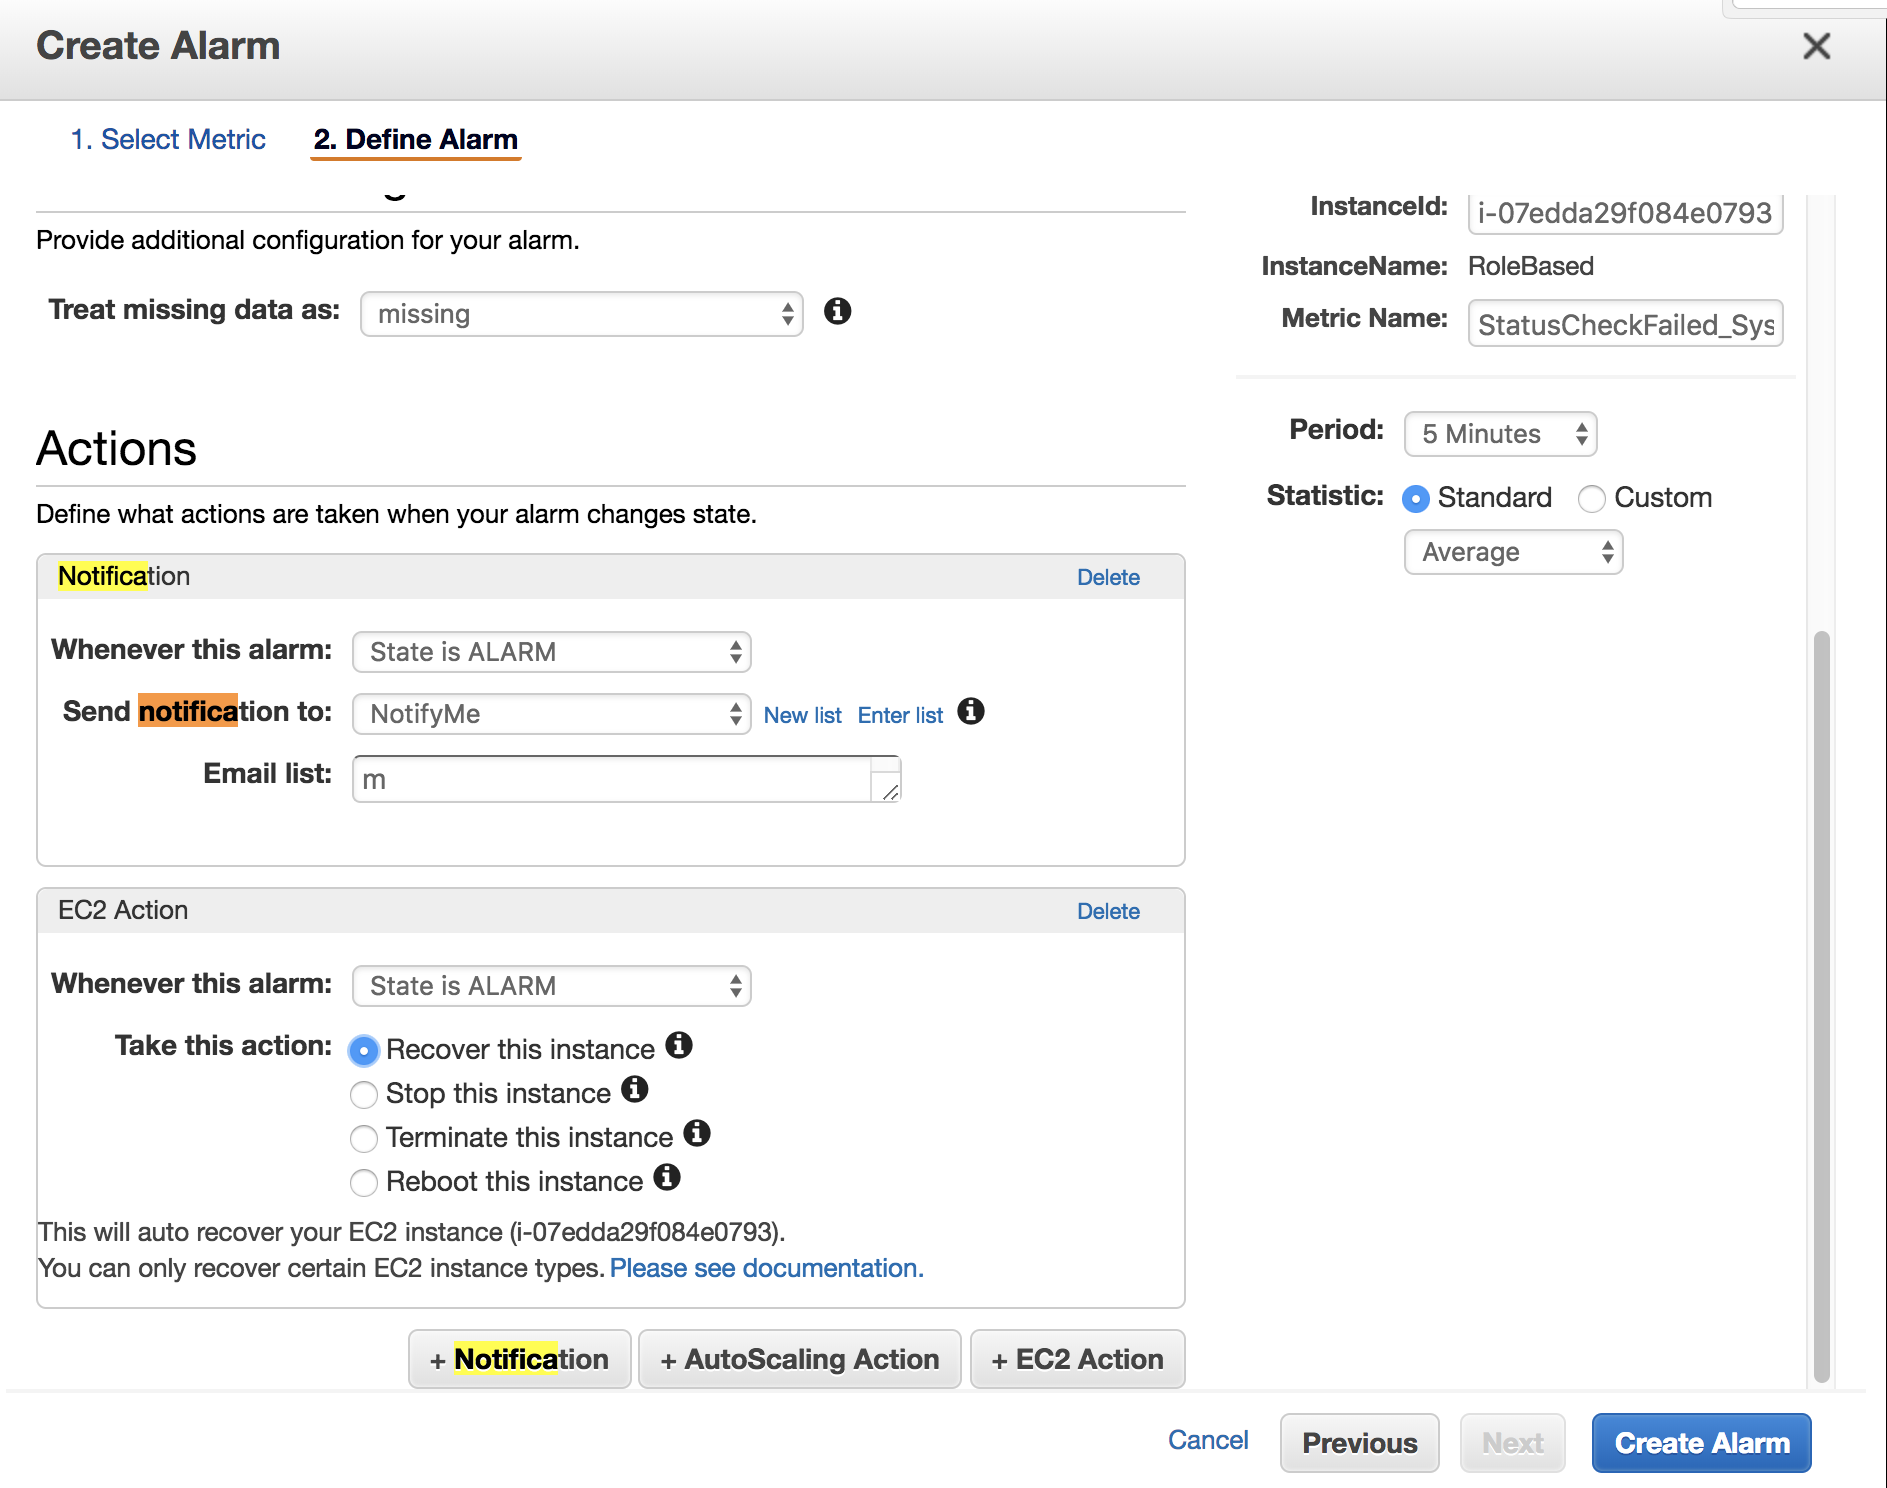
Add an EC2 action, then choose Recover this instance. Set the threshold value to be 1, set the Statistic to Minimum, and specify the number of consecutive periods to an appropriate value (two or three minutes is a good starting point, assuming that you are collecting metrics at one-minute intervals):
Note This feature is currently available for the C3, C4, M3, R3, and T2 instance types running in the US East (N. Virginia) region
6) Click on the Close button in the pop-up window to return to the Instances page.

You have completed the monitoring step.