Create Hosted Zone and Record Sets
- Go to Amazon AWS -> services and select Route 53
- Click on Hosted Zones and create a hosted zone.
- Give the domain name you have bought, make sure that you don’t add www. to it. Example: mydomain.com
- Enter a comment if you like
- Select Type as Public Hosted Zone.
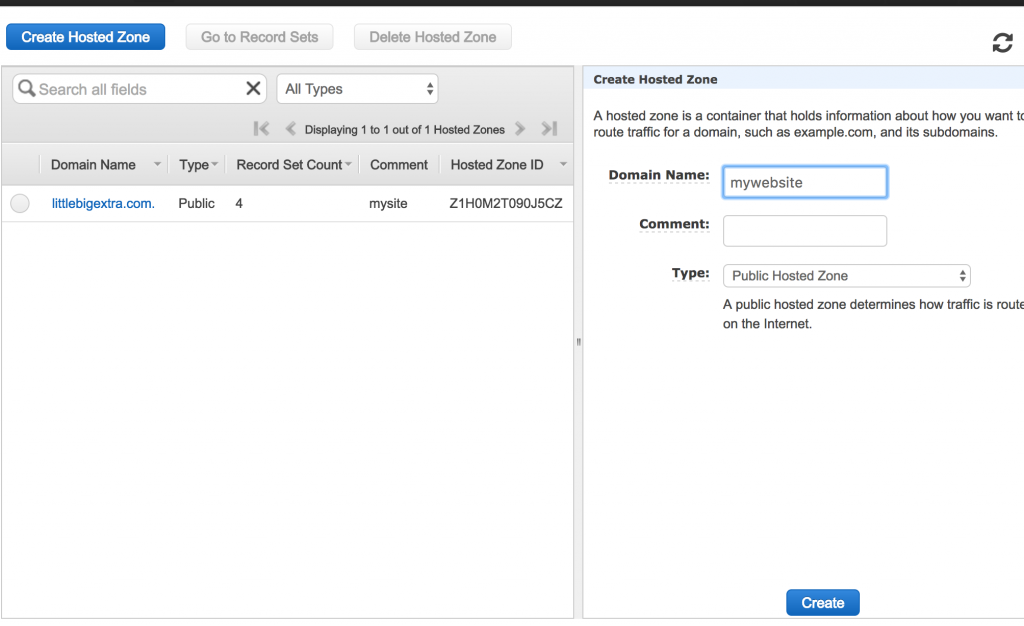
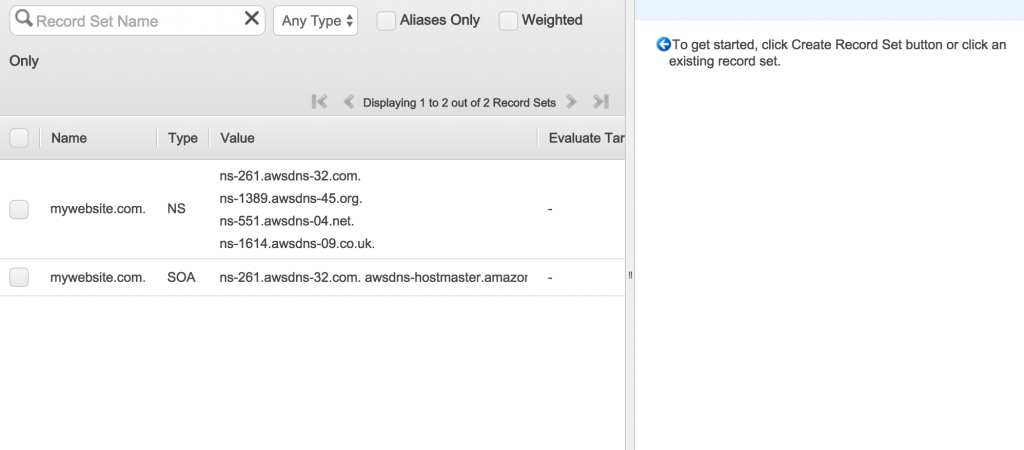
- You should see something like below on your screen, Name Space servers, usually there are 4 different entries.Make note of these as you need them in the last step.
4. Now
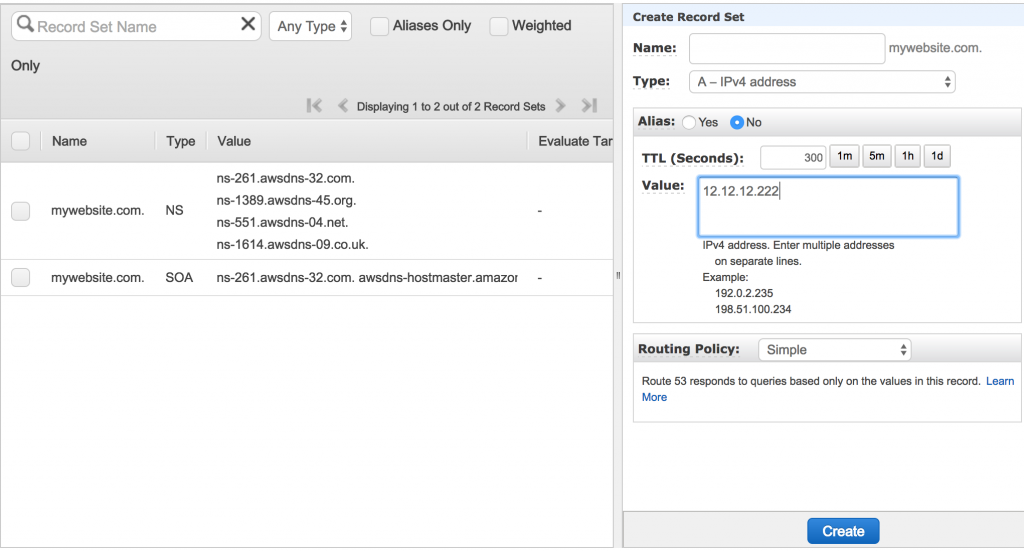
Create a recordset and add values as shown in image below
- Keep Name field empty
- Type as A
- Alias as No
- Value – This should be the value of your IPv4 Public IP of your EC2 instance.
- Routing Policy: Simple
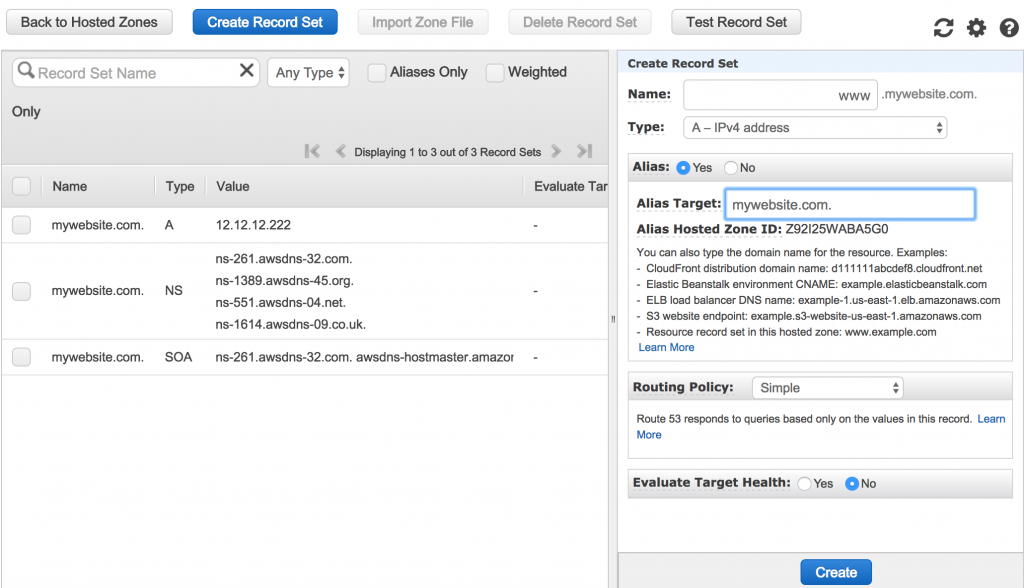
5. Now we need to bring subdomain too, so www.mydomain.com should also work
- In Name field type www.
- Type as A
- Alias as Yes
- Alias Target from dropdown select your site name
- Routing Policy: Simple
This completes Route 53 steps.
Add the Amazon NameSpaceServers in Control panel of Domain Provider
- Now go to GoDaddy domain console and select your domain and click the “DNS” button.
- Name servers are located at the bottom. Change the Namespace servers (you should see 2 servers name) from default to custom.
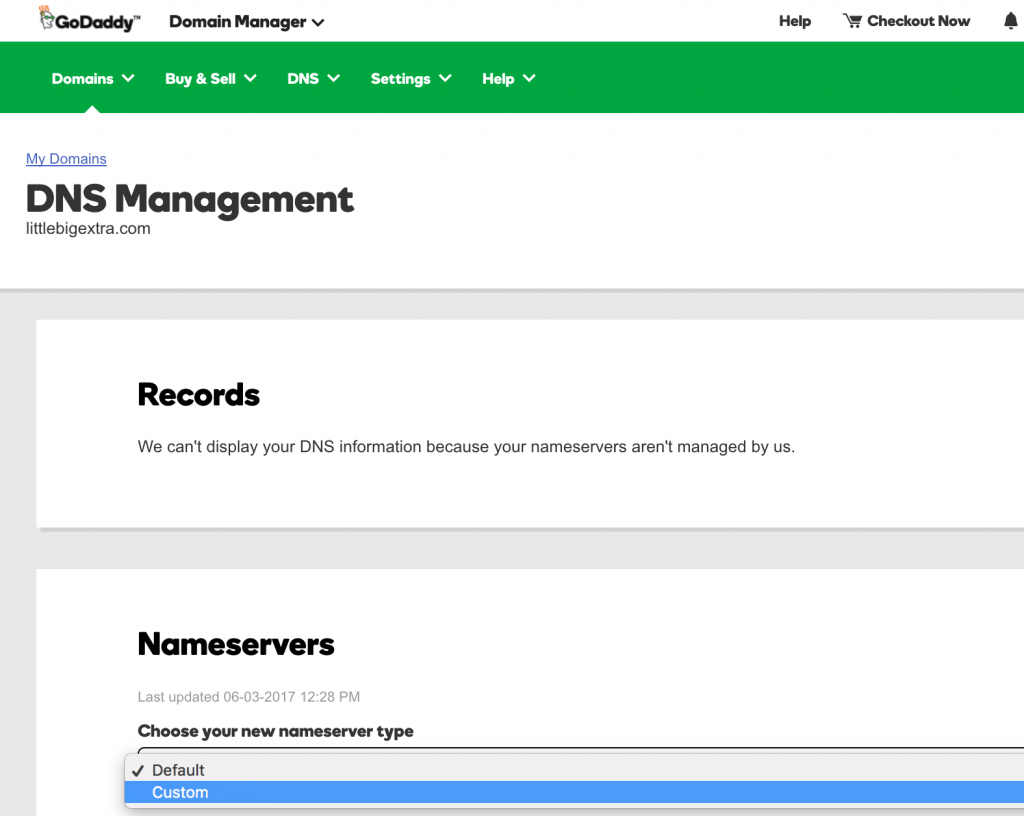
- Add all the 4 namespace servers you got in STEP 4, add them one by one. Do not enter the period at the end of a name server when updating GoDaddy Name Server records. Save it and wait for a couple of minutes. Type your domain name in the browser and you should be redirected to your website.
To implement SSL certificate to mydomain.com, follow the link:
https://acvits.info/domain-address-ssl-certificate-implementation/